Blizzardous Threads of Red: Difference between revisions
(→35px|link= Trace of Tears - Earthly Exchange Shop: +shop table) |
m (Text replacement - "Blizzardous Frederick portrait" to "Frederick Yang character icon") |
||
| (37 intermediate revisions by 2 users not shown) | |||
| Line 1: | Line 1: | ||
{{Notice DLC}} | |||
{{#vardefine:bannerOverride | Blizzardous Threads of Red banner.png }} | |||
{{#invoke:CargoQuery|main | |||
|q?tables=Event | |||
|q?fields=name=name,startDate=startDate,endDate=endDate,promoImage=promoImage | |||
|q?where=name="Blizzardous Threads of Red" | |||
|template=Event infobox | |||
|q?limit=1 | |||
}} | |||
<p>''The world is vast, and full of life. But where is the answer to the question of love?''<br /> | <p>''The world is vast, and full of life. But where is the answer to the question of love?''<br /> | ||
''Your only wish is to take hold of his hand, and read with him the story of a lifetime.''</p> | ''Your only wish is to take hold of his hand, and read with him the story of a lifetime.''</p> | ||
==Event Phases== | ==Event Phases== | ||
The event is available in | The event is available in four phases which gradually open more content as time passes. These phases are timed as follows (all times shown in UTC+9): | ||
* Phase 1: Jan 12, 11:00 | * Phase 1: Jan 12, 11:00 | ||
* Phase 2: Jan | * Phase 2: Jan 16, 11:00 | ||
* Phase 3: Jan 20, 11:00 | * Phase 3: Jan 20, 11:00 | ||
* Phase 4: Jan 24, 11:00 | * Phase 4: Jan 24, 11:00 | ||
| Line 15: | Line 23: | ||
''The first day of the New Year is a lucky day! Welcome the new year with the sound of firecrackers. Go to the temple fair, watch the lion dances, and make your New Year wishes together with your beloved's hand in yours!'' | ''The first day of the New Year is a lucky day! Welcome the new year with the sound of firecrackers. Go to the temple fair, watch the lion dances, and make your New Year wishes together with your beloved's hand in yours!'' | ||
From Jan 5-12, complete event quests to receive {{ | From Jan 5-12, complete event quests to receive {{Item icon|Lucky Dumpling}}s and other rewards. Exchange {{Item icon|Lucky Dumpling}}s for random Puzzle Pieces to complete the puzzle for additional rewards! The completed puzzle will be added into player's [[Illustrations]] collection. | ||
Players who complete ''all'' available tasks will receive a total of {{ | Players who complete ''all'' available tasks will receive a total of {{Item icon|Lucky Dumpling}} x550, which is enough for 36 puzzle piece redemptions. With all tasks complete, players may receive up to 13 duplicate puzzle pieces (as every 5 duplicates refunds one new piece) and still complete the puzzle. | ||
===Quests=== | ===Quests=== | ||
| Line 25: | Line 33: | ||
| Log in to the game | | Log in to the game | ||
| | | | ||
* {{ | * {{Item icon|Lucky Dumpling}} x10 | ||
* {{Currency|Stellin}} x2,000 | * {{Currency|Stellin}} x2,000 | ||
| Daily | | Daily | ||
| Line 31: | Line 39: | ||
| Perform 5 interactions in Visit | | Perform 5 interactions in Visit | ||
| | | | ||
* {{ | * {{Item icon|Lucky Dumpling}} x10 | ||
* {{Currency|Stellin}} x2,000 | * {{Currency|Stellin}} x2,000 | ||
| Daily | | Daily | ||
| Line 39: | Line 47: | ||
* Complete 4 Resource Requisition(s) at NXX HQ | * Complete 4 Resource Requisition(s) at NXX HQ | ||
| | | | ||
* {{ | * {{Item icon|Lucky Dumpling}} x10 | ||
* {{Item icon|Oracle of Justice III}} x5 | * {{Item icon|Oracle of Justice III}} x5 | ||
| Daily | | Daily | ||
| Line 47: | Line 55: | ||
* Complete 5 daily jobs in [[Fieldwork]] | * Complete 5 daily jobs in [[Fieldwork]] | ||
| | | | ||
* {{ | * {{Item icon|Lucky Dumpling}} x10 | ||
* {{Currency|Stellin}} x2000 | * {{Currency|Stellin}} x2000 | ||
|- | |- | ||
| Line 59: | Line 67: | ||
* Complete 2 [[Legal Studies#Clients|Legal Consult]] | * Complete 2 [[Legal Studies#Clients|Legal Consult]] | ||
| | | | ||
* {{ | * {{Item icon|Lucky Dumpling}} x10 | ||
* ''Corresponding "Chip II"'' x4 | * ''Corresponding "Chip II"'' x4 | ||
| Daily | | Daily | ||
| Line 65: | Line 73: | ||
| Use 480 AP | | Use 480 AP | ||
| | | | ||
* {{ | * {{Item icon|Lucky Dumpling}} x40 | ||
* {{Currency|Stellin}} x10,000 | * {{Currency|Stellin}} x10,000 | ||
| One-time | | One-time | ||
| Line 71: | Line 79: | ||
| Use 960 AP | | Use 960 AP | ||
| | | | ||
* {{ | * {{Item icon|Lucky Dumpling}} x40 | ||
* {{Currency|Stellin}} x20,000 | * {{Currency|Stellin}} x20,000 | ||
| One-time | | One-time | ||
| Line 77: | Line 85: | ||
| Spend 100,000 Stellin | | Spend 100,000 Stellin | ||
| | | | ||
* {{ | * {{Item icon|Lucky Dumpling}} x40 | ||
* {{Item icon|Logic Impression III}} x10 | * {{Item icon|Logic Impression III}} x10 | ||
| One-time | | One-time | ||
| Line 83: | Line 91: | ||
| Spend 200,000 Stellin | | Spend 200,000 Stellin | ||
| | | | ||
* {{ | * {{Item icon|Lucky Dumpling}} x40 | ||
* {{Item icon|Empathy Impression III}} x10 | * {{Item icon|Empathy Impression III}} x10 | ||
| One-time | | One-time | ||
| Line 89: | Line 97: | ||
| Challenge the Temple of Trials 1 time(s) | | Challenge the Temple of Trials 1 time(s) | ||
| | | | ||
* {{ | * {{Item icon|Lucky Dumpling}} x40 | ||
* {{Item icon|Intuition Impression III}} x10 | * {{Item icon|Intuition Impression III}} x10 | ||
| One-time | | One-time | ||
| Line 115: | Line 123: | ||
==Snowy Mountain: Event Stories== | ==Snowy Mountain: Event Stories== | ||
During the event, "Snowy Mountain" Main Story and Side Story tasks will be available in stages. Complete the tasks to obtain {{ | During the event, "Snowy Mountain" Main Story and Side Story tasks will be available in stages. Complete the tasks to obtain {{Item icon|Holly Stationery}}, {{Currency|Tears of Themis - Limited}}, {{Badge icon|Winter Leaves Badge}}, event-limited R cards, and more. | ||
===Main Story=== | ===Main Story=== | ||
'''Phase 1''' | '''Phase 1''' | ||
[[File:BToR Story header 1.png|right|300px]] | |||
* | * [[Blizzardous Threads of Red Main Story Prologue]] | ||
* [[Blizzardous Threads of Red Main Story 1-1: Villa Guests]] | |||
* [[Blizzardous Threads of Red Main Story 1-2: "Accident"]] | |||
* [[Blizzardous Threads of Red Main Story 1-3: Suspicious Danger]] | |||
{{Clear}} | |||
'''Phase 2''' | |||
[[File:BToR Story header 2.png|right|300px]] | |||
* [[Blizzardous Threads of Red Main Story 2-1: Treasure Auction]] | |||
* [[Blizzardous Threads of Red Main Story 2-2: Gloomy Villa]] | |||
* [[Blizzardous Threads of Red Main Story 2-3: Hidden Bewilderment]] | |||
{{Clear}} | |||
'''Phase 3''' | |||
[[File:BToR Story header 3.png|right|300px]] | |||
* [[Blizzardous Threads of Red Main Story 3-1: Secluded Villa]] | |||
* [[Blizzardous Threads of Red Main Story 3-2: The Third Mystery]] | |||
* [[Blizzardous Threads of Red Main Story 3-3: Hidden Door]] | |||
* [[Blizzardous Threads of Red Main Story 3-4: Winter Day]] | |||
{{Clear}} | |||
'''Phase 4''' | |||
[[File:BToR Story header 4.png|right|300px]] | |||
* [[Blizzardous Threads of Red Main Story 4-1: Predicament]] | |||
* [[Blizzardous Threads of Red Main Story 4-2: Zangr's Hint]] | |||
* [[Blizzardous Threads of Red Main Story 4-3: Winter Night]] | |||
* [[Blizzardous Threads of Red Main Story 4-4: Silent Snow]] | |||
* [[Blizzardous Threads of Red Main Story 4-5: When the Snow Melts]] | |||
{{Clear}} | |||
===Side Story=== | ===Side Story=== | ||
'''Phase 1''' | '''Phase 1''' | ||
* | * [[Blizzardous Threads of Red Side Story 1-1: Shantel's Jewelry]] | ||
* [[Blizzardous Threads of Red Side Story 1-2: Ben's Secret]] | |||
* [[Blizzardous Threads of Red Side Story 1-3: Clean Water]] | |||
'''Phase 2''' | |||
* [[Blizzardous Threads of Red Side Story 2-1: Inextinguishable]] | |||
* [[Blizzardous Threads of Red Side Story 2-2: Cowardly Bernard]] | |||
* [[Blizzardous Threads of Red Side Story 2-3: Rey's Worries]] | |||
'''Phase 3''' | |||
* [[Blizzardous Threads of Red Side Story 3-1: Childhood Candies]] | |||
* [[Blizzardous Threads of Red Side Story 3-2: The Lady's Song]] | |||
* [[Blizzardous Threads of Red Side Story 3-3: Forever Young]] | |||
'''Phase 4''' | |||
* [[Blizzardous Threads of Red Side Story 4-1: New Redemption]] | |||
* [[Blizzardous Threads of Red Side Story 4-2: Reporter's Professionalism]] | |||
* [[Blizzardous Threads of Red Side Story 4-3: Zangr's Next Step]] | |||
===General Exploration=== | ===General Exploration=== | ||
===Villa Rooms: Artifact and Guest Stories=== | ===Villa Rooms: Artifact and Guest Stories=== | ||
{|class="wikitable" | |||
!Location | |||
!colspan=3|Residents | |||
|- | |||
!Chrysanthemum House | |||
|style="text-align:center"|[[File:Passerby F1 character icon.png|125px|link=Villa Rooms: Rey Rong]]<br />[[Villa Rooms: Rey Rong|Rey Rong]]<br />{{Currency|Donut Jade}} | |||
|style="text-align:center"|[[File:Middle-age M character icon.png|125px|link=Villa Rooms: Sam Zhang]]<br />[[Villa Rooms: Sam Zhang|Sam Zhang]] | |||
|style="text-align:center"|[[File:Nurse character icon.png|125px|link=Villa Rooms: Nurse Shan]]<br />[[Villa Rooms: Nurse Shan|Nurse Shan]]<br />{{Currency|Medical Record}} | |||
|- | |||
!Bamboo Pavilion | |||
|style="text-align:center"|[[File:Boss 5 Winter character icon.png|125px|link=Villa Rooms: Mr. Jiang]]<br />[[Villa Rooms: Mr. Jiang|Mr. Jiang]]<br />{{Currency|Account Book}} | |||
|style="text-align:center"|[[File:Boss 4 Winter character icon.png|125px|link=Villa Rooms: Tony]]<br />[[Villa Rooms: Tony|Tony]] | |||
|style="text-align:center"|[[File:Boss 20 character icon.png|125px|link=Villa Rooms: Ben Yuan]]<br />[[Villa Rooms: Ben Yuan|Ben Yuan]]<br />{{Currency|Longevity Lock}} | |||
|- | |||
!Orchid Courtyard | |||
|style="text-align:center"|[[File:Boss 3 Winter character icon.png|125px|link=Villa Rooms: Shantel Pan]]<br />[[Villa Rooms: Shantel Pan|Shantel Pan]]<br />{{Currency|Tabloid Picture}} | |||
|style="text-align:center"|[[File:Boss 7 Winter character icon.png|125px|link=Villa Rooms: Ashley]]<br />[[Villa Rooms: Ashley|Ashley]] | |||
|style="text-align:center"|[[File:Frederick Yang character icon.png|125px|link=Villa Rooms: Frederick]]<br />[[Villa Rooms: Frederick|Frederick]]<br />{{Currency|Jade Dust Folklore}} | |||
|- | |||
!Plum Study | |||
|style="text-align:center"|[[File:Boss 18 Winter character icon.png|125px|link=Villa Rooms: Casey Cao]]<br />[[Villa Rooms: Casey Cao|Casey Cao]]<br />{{Currency|Luminous Pearl}} | |||
|style="text-align:center"|[[File:Rich M character icon.png|125px|link=Villa Rooms: Elijah Yin]]<br />[[Villa Rooms: Elijah Yin|Elijah Yin]] | |||
|style="text-align:center"|[[File:Plump M Winter character icon.png|125px|link=Villa Rooms: Bernard]]<br />[[Villa Rooms:Bernard|Bernard]]<br />{{Currency|Golden Bell Bracelet}} | |||
|} | |||
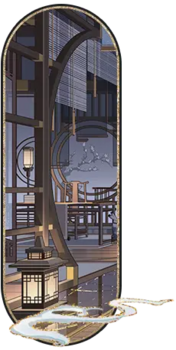
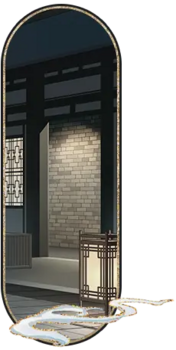
==Villa Courtyard: Investigation Gameplay== | ==Villa Courtyard: Investigation Gameplay== | ||
| Line 148: | Line 229: | ||
===Phase 1: Ink Study=== | ===Phase 1: Ink Study=== | ||
==== | {| | ||
|style="text-align:center"|[[File:BToR Courtyard 1-1.png|x150px|link=Villa Courtyard: Ink Study 1 (Fengya)]] | |||
|style="text-align:center"|[[File:BToR Courtyard 1-2.png|x150px|link=Villa Courtyard: Ink Study 2 (Qiankun)]] | |||
|rowspan=3 style="padding-left:55px"|[[File:BToR Courtyard 1-5.png|x350px|link=Villa Courtyard: Ink Study 5 (Yibian)]] | |||
|- | |||
! [[Villa Courtyard: Ink Study 1 (Fengya)|Fengya]] | |||
! [[Villa Courtyard: Ink Study 2 (Qiankun)|Qiankun]] | |||
|- | |||
|style="text-align:center"|[[File:BToR Courtyard 1-3.png|x150px|link=Villa Courtyard: Ink Study 3 (Wuxuan)]] | |||
|style="text-align:center"|[[File:BToR Courtyard 1-4.png|x150px|link=Villa Courtyard: Ink Study 4 (Tianxing)]] | |||
|- | |||
! [[Villa Courtyard: Ink Study 3 (Wuxuan)|Wuxuan]] | |||
! [[Villa Courtyard: Ink Study 4 (Tianxing)|Tianxing]] | |||
! [[Villa Courtyard: Ink Study 5 (Yibian)|Yibian]] | |||
|} | |||
==== | ===Phase 2: Bright Pavilion=== | ||
{| | |||
|style="text-align:center"|[[File:BToR Courtyard 2-1.png|x150px|link=Villa Courtyard: Bright Pavilion 1 (North Wing)]] | |||
|style="text-align:center"|[[File:BToR Courtyard 2-2.png|x150px|link=Villa Courtyard: Bright Pavilion 2 (South Wing)]] | |||
|rowspan=3 style="padding-left:55px"|[[File:BToR Courtyard 2-5.png|x350px|link=]] | |||
|- | |||
! [[Villa Courtyard: Bright Pavilion 1 (North Wing)|North Wing]] | |||
! [[Villa Courtyard: Bright Pavilion 2 (South Wing)|South Wing]] | |||
|- | |||
|style="text-align:center"|[[File:BToR Courtyard 2-3.png|x150px|link=Villa Courtyard: Bright Pavilion 3 (East Wing)]] | |||
|style="text-align:center"|[[File:BToR Courtyard 2-4.png|x150px|link=Villa Courtyard: Bright Pavilion 4 (West Wing)]] | |||
|- | |||
! [[Villa Courtyard: Bright Pavilion 3 (East Wing)|East Wing]] | |||
! [[Villa Courtyard: Bright Pavilion 4 (West Wing)|West Wing]] | |||
! [[Villa Courtyard: Bright Pavilion 5 (Main Hall)|Main Hall]] | |||
|} | |||
==== | ===Phase 3: Labyrinth Pavilion=== | ||
{| | |||
|style="text-align:center"|[[File:BToR Courtyard 3-1.png|x150px|link=Villa Courtyard: Labyrinth Pavilion 1 (Way of Adversity)]] | |||
|style="text-align:center"|[[File:BToR Courtyard 3-2.png|x150px|link=Villa Courtyard: Labyrinth Pavilion 2 (Way of Truth)]] | |||
|rowspan=3 style="padding-left:55px"|[[File:BToR Courtyard 3-5.png|x350px|link=]] | |||
|- | |||
! [[Villa Courtyard: Labyrinth Pavilion 1 (Way of Adversity)|Way of Adversity]] | |||
! [[Villa Courtyard: Labyrinth Pavilion 2 (Way of Truth)|Way of Truth]] | |||
|- | |||
|style="text-align:center"|[[File:BToR Courtyard 3-3.png|x150px|link=Villa Courtyard: Labyrinth Pavilion 3 (Way of Mystery)]] | |||
|style="text-align:center"|[[File:BToR Courtyard 3-4.png|x150px|link=Villa Courtyard: Labyrinth Pavilion 4 (Way of Choices)]] | |||
|- | |||
! [[Villa Courtyard: Labyrinth Pavilion 3 (Way of Mystery)|Way of Mystery]] | |||
! [[Villa Courtyard: Labyrinth Pavilion 4 (Way of Choices)|Way of Choices]] | |||
! [[Villa Courtyard: Labyrinth Pavilion 5 (The Insatiable Journey)|The Insatiable Journey]] | |||
|} | |||
===Phase | ===Phase 4: Vault=== | ||
{| | |||
|style="text-align:center"|[[File:BToR Courtyard 4-1.png|x150px|link=Villa Courtyard: Vault 1 (1st Try)]] | |||
=== | |style="text-align:center"|[[File:BToR Courtyard 4-2.png|x150px|link=Villa Courtyard: Vault 2 (2nd Try)]] | ||
|rowspan=3 style="padding-left:55px"|[[File:BToR Courtyard 4-5.png|x350px|link=]] | |||
|- | |||
! [[Villa Courtyard: Vault 1 (1st Try)|1st Try]] | |||
! [[Villa Courtyard: Vault 2 (2nd Try)|2nd Try]] | |||
=== | |- | ||
|style="text-align:center"|[[File:BToR Courtyard 4-3.png|x150px|link=Villa Courtyard: Vault 3 (3rd Try)]] | |||
|style="text-align:center"|[[File:BToR Courtyard 4-4.png|x150px|link=Villa Courtyard: Vault 4 (4th Try)]] | |||
|- | |||
! [[Villa Courtyard: Vault 3 (3rd Try)|3rd Try]] | |||
! [[Villa Courtyard: Vault 4 (4th Try)|4th Try]] | |||
! [[Villa Courtyard: Vault 5 (Final Try)|Final Try]] | |||
|} | |||
==Event Tasks== | ==Event Tasks== | ||
| Line 184: | Line 312: | ||
|- | |- | ||
|Complete Side Story - Shantel's Jewelry (Unlocks on 1/13 after Chapter 1 has been completed) | |Complete Side Story - Shantel's Jewelry (Unlocks on 1/13 after Chapter 1 has been completed) | ||
|{{ | |{{Item icon|Holly Stationery}} x200 | ||
|- | |- | ||
|Complete Side Story - Ben's Secret (Unlocks on 1/14 after Chapter 1 has been completed) | |Complete Side Story - Ben's Secret (Unlocks on 1/14 after Chapter 1 has been completed) | ||
|{{ | |{{Item icon|Holly Stationery}} x200 | ||
|- | |- | ||
|Complete Side Story - Clean Water (Unlocks on 1/15 after Chapter 1 has been completed) | |Complete Side Story - Clean Water (Unlocks on 1/15 after Chapter 1 has been completed) | ||
|{{ | |{{Item icon|Holly Stationery}} x200 | ||
|- | |- | ||
|Complete the story of 1 character and their Artifact in Villa Rooms | |Complete the story of 1 character and their Artifact in Villa Rooms | ||
|{{ | |{{Item icon|Holly Stationery}} x400 | ||
|- | |- | ||
|Complete the stories of 2 characters and their Artifacts in Villa Rooms | |Complete the stories of 2 characters and their Artifacts in Villa Rooms | ||
|{{ | |{{Item icon|Holly Stationery}} x400 | ||
|- | |- | ||
|Complete a level in Ink Study in Villa Courtyard | |Complete a level in Ink Study in Villa Courtyard | ||
|{{ | |{{Item icon|Holly Stationery}} x300 | ||
|- | |- | ||
|Complete all levels in Ink Study in Villa Courtyard | |Complete all levels in Ink Study in Villa Courtyard | ||
|{{ | |{{Item icon|Holly Stationery}} x500 | ||
|- | |- | ||
|Obtain all Artifacts in Ink Study in Villa Courtyard | |Obtain all Artifacts in Ink Study in Villa Courtyard | ||
|{{ | |{{Item icon|Holly Stationery}} x300 | ||
|- | |- | ||
|Obtain all Keys in Ink Study in Villa Courtyard | |Obtain all Keys in Ink Study in Villa Courtyard | ||
|{{ | |{{Item icon|Holly Stationery}} x300 | ||
|- | |- | ||
|Obtain all Silk Pouches in Ink Study in Villa Courtyard | |Obtain all Silk Pouches in Ink Study in Villa Courtyard | ||
|{{ | |{{Item icon|Holly Stationery}} x300 | ||
|} | |} | ||
| Line 226: | Line 354: | ||
|- | |- | ||
|Complete Side Story - Inextinguishable (Unlocks on 1/17 after previous Side Story has been completed) | |Complete Side Story - Inextinguishable (Unlocks on 1/17 after previous Side Story has been completed) | ||
|{{ | |{{Item icon|Holly Stationery}} x200 | ||
|- | |- | ||
|Complete Side Story - Cowardly Bernard (Unlocks on 1/18 after Chapter 2 has been completed) | |Complete Side Story - Cowardly Bernard (Unlocks on 1/18 after Chapter 2 has been completed) | ||
|{{ | |{{Item icon|Holly Stationery}} x200 | ||
|- | |- | ||
|Complete Side Story - Rey's Worries (Unlocks on 1/19 after previous Side Story has been completed) | |Complete Side Story - Rey's Worries (Unlocks on 1/19 after previous Side Story has been completed) | ||
|{{ | |{{Item icon|Holly Stationery}} x200 | ||
|- | |- | ||
|Complete the stories of 3 characters and their Artifacts in Villa Rooms | |Complete the stories of 3 characters and their Artifacts in Villa Rooms | ||
|{{ | |{{Item icon|Holly Stationery}} x400 | ||
|- | |- | ||
|Complete the stories of 4 characters and their Artifacts in Villa Rooms | |Complete the stories of 4 characters and their Artifacts in Villa Rooms | ||
|{{ | |{{Item icon|Holly Stationery}} x400 | ||
|- | |- | ||
|Complete a level in Bright Pavilion in Villa Courtyard | |Complete a level in Bright Pavilion in Villa Courtyard | ||
|{{ | |{{Item icon|Holly Stationery}} x300 | ||
|- | |- | ||
|Complete all levels in Bright Pavilion in Villa Courtyard | |Complete all levels in Bright Pavilion in Villa Courtyard | ||
|{{ | |{{Item icon|Holly Stationery}} x500 | ||
|- | |- | ||
|Obtain all Artifacts in Bright Pavilion in Villa Courtyard | |Obtain all Artifacts in Bright Pavilion in Villa Courtyard | ||
|{{ | |{{Item icon|Holly Stationery}} x300 | ||
|- | |- | ||
|Obtain all Keys in Bright Pavilion in Villa Courtyard | |Obtain all Keys in Bright Pavilion in Villa Courtyard | ||
|{{ | |{{Item icon|Holly Stationery}} x300 | ||
|- | |- | ||
|Obtain all Silk Pouches in Bright Pavilion in Villa Courtyard | |Obtain all Silk Pouches in Bright Pavilion in Villa Courtyard | ||
|{{ | |{{Item icon|Holly Stationery}} x300 | ||
|} | |} | ||
| Line 268: | Line 396: | ||
|- | |- | ||
|Complete Side Story - Childhood Candies (Unlocks on 1/21 after Chapter 3 has been completed) | |Complete Side Story - Childhood Candies (Unlocks on 1/21 after Chapter 3 has been completed) | ||
|{{ | |{{Item icon|Holly Stationery}} x200 | ||
|- | |- | ||
|Complete Side Story - The Lady's Song (Unlocks on 1/22 after previous Side Story has been completed) | |Complete Side Story - The Lady's Song (Unlocks on 1/22 after previous Side Story has been completed) | ||
|{{ | |{{Item icon|Holly Stationery}} x200 | ||
|- | |- | ||
|Complete Side Story - Forever Young (Unlocks on 1/23 after Chapter 3 has been completed) | |Complete Side Story - Forever Young (Unlocks on 1/23 after Chapter 3 has been completed) | ||
|{{ | |{{Item icon|Holly Stationery}} x200 | ||
|- | |- | ||
|Complete the stories of 5 characters and their Artifacts in Villa Rooms | |Complete the stories of 5 characters and their Artifacts in Villa Rooms | ||
|{{ | |{{Item icon|Holly Stationery}} x400 | ||
|- | |- | ||
|Complete the stories of 6 characters and their Artifacts in Villa Rooms | |Complete the stories of 6 characters and their Artifacts in Villa Rooms | ||
|{{ | |{{Item icon|Holly Stationery}} x400 | ||
|- | |- | ||
|Complete a level in the Labyrinth Pavilion in Villa Courtyard | |Complete a level in the Labyrinth Pavilion in Villa Courtyard | ||
|{{ | |{{Item icon|Holly Stationery}} x300 | ||
|- | |- | ||
|Complete all levels in the Labyrinth Pavilion in Villa Courtyard | |Complete all levels in the Labyrinth Pavilion in Villa Courtyard | ||
|{{ | |{{Item icon|Holly Stationery}} x500 | ||
|- | |- | ||
|Obtain all Artifacts in Labyrinth Pavilion in Villa Courtyard | |Obtain all Artifacts in Labyrinth Pavilion in Villa Courtyard | ||
|{{ | |{{Item icon|Holly Stationery}} x300 | ||
|- | |- | ||
|Obtain all Keys in Labyrinth Pavilion in Villa Courtyard | |Obtain all Keys in Labyrinth Pavilion in Villa Courtyard | ||
|{{ | |{{Item icon|Holly Stationery}} x300 | ||
|- | |- | ||
|Obtain all Silk Pouches in Labyrinth Pavilion in Villa Courtyard | |Obtain all Silk Pouches in Labyrinth Pavilion in Villa Courtyard | ||
|{{ | |{{Item icon|Holly Stationery}} x300 | ||
|} | |} | ||
| Line 307: | Line 435: | ||
|- | |- | ||
|Complete all Main Story Tasks | |Complete all Main Story Tasks | ||
|{{ | |{{Item icon|Holly Stationery}} x800<br />{{Item icon|Luke "Ode to Gallantry"}}<br />{{Item icon|Artem "Weight of Responsibility"}}<br />{{Item icon|Vyn "Deep in Blossoms"}}<br />{{Item icon|Marius "Fated Reunion"}} | ||
|- | |- | ||
|Complete all Side Story Tasks | |Complete all Side Story Tasks | ||
|{{ | |{{Item icon|Holly Stationery}} x600 | ||
|- | |- | ||
|Complete Main Story - Snowy Mountain IV | |Complete Main Story - Snowy Mountain IV | ||
| Line 316: | Line 444: | ||
|- | |- | ||
|Complete Side Story - New Redemption (Unlocks on 1/25 after Chapter 4 has been completed) | |Complete Side Story - New Redemption (Unlocks on 1/25 after Chapter 4 has been completed) | ||
|{{ | |{{Item icon|Holly Stationery}} x200 | ||
|- | |- | ||
|Complete Side Story - Reporter's Professionalism (Unlocks on 1/26 after Chapter 4 has been completed) | |Complete Side Story - Reporter's Professionalism (Unlocks on 1/26 after Chapter 4 has been completed) | ||
|{{ | |{{Item icon|Holly Stationery}} x200 | ||
|- | |- | ||
|Complete Side Story Zangr's Next Step (Unlocks on 1/27 after Chapter 4 has been completed) | |Complete Side Story Zangr's Next Step (Unlocks on 1/27 after Chapter 4 has been completed) | ||
|{{ | |{{Item icon|Holly Stationery}} x200 | ||
|- | |- | ||
|Complete the stories of 7 characters and their Artifacts in Villa Rooms | |Complete the stories of 7 characters and their Artifacts in Villa Rooms | ||
|{{ | |{{Item icon|Holly Stationery}} x400 | ||
|- | |- | ||
|Complete the stories of 8 characters and their Artifacts in Villa Rooms | |Complete the stories of 8 characters and their Artifacts in Villa Rooms | ||
|{{ | |{{Item icon|Holly Stationery}} x400 | ||
|- | |- | ||
|Complete a level in the Vault in Villa Courtyard | |Complete a level in the Vault in Villa Courtyard | ||
|{{ | |{{Item icon|Holly Stationery}} x300 | ||
|- | |- | ||
|Complete all levels in the Vault in Villa Courtyard | |Complete all levels in the Vault in Villa Courtyard | ||
|{{ | |{{Item icon|Holly Stationery}} x500 | ||
|- | |- | ||
|Obtain all Artifacts in the Vault in Villa Courtyard | |Obtain all Artifacts in the Vault in Villa Courtyard | ||
|{{ | |{{Item icon|Holly Stationery}} x300 | ||
|- | |- | ||
|Obtain all Keys in the Vault in Villa Courtyard | |Obtain all Keys in the Vault in Villa Courtyard | ||
|{{ | |{{Item icon|Holly Stationery}} x300 | ||
|- | |- | ||
|Obtain all Silk Pouches in the Vault in Villa Courtyard | |Obtain all Silk Pouches in the Vault in Villa Courtyard | ||
|{{ | |{{Item icon|Holly Stationery}} x300 | ||
|} | |} | ||
{{tab/end}} | {{tab/end}} | ||
| Line 371: | Line 499: | ||
|Complete 9 Anomaly Investigation levels || {{Currency|Limited-Time Activeness}} x5 || Daily | |Complete 9 Anomaly Investigation levels || {{Currency|Limited-Time Activeness}} x5 || Daily | ||
|- | |- | ||
|Use 750 AP || {{Currency|Limited-Time Activeness}} x20 || Weekly | |Use 750 AP || {{Currency|Limited-Time Activeness}} x20 || Weekly * | ||
|- | |- | ||
|Use 1000 AP || {{Currency|Limited-Time Activeness}} x30 || Weekly | |Use 1000 AP || {{Currency|Limited-Time Activeness}} x30 || Weekly * | ||
|- | |- | ||
|Use 1250 AP || {{Currency|Limited-Time Activeness}} x40 || Weekly | |Use 1250 AP || {{Currency|Limited-Time Activeness}} x40 || Weekly * | ||
|- | |- | ||
|Complete 10 daily jobs in Fieldwork || {{Currency|Limited-Time Activeness}} x20 || Weekly | |Complete 10 daily jobs in Fieldwork || {{Currency|Limited-Time Activeness}} x20 || Weekly * | ||
|- | |- | ||
|Complete 15 daily jobs in Fieldwork || {{Currency|Limited-Time Activeness}} x30 || Weekly | |Complete 15 daily jobs in Fieldwork || {{Currency|Limited-Time Activeness}} x30 || Weekly * | ||
|- | |- | ||
|Complete 20 daily jobs in Fieldwork || {{Currency|Limited-Time Activeness}} x40 || Weekly | |Complete 20 daily jobs in Fieldwork || {{Currency|Limited-Time Activeness}} x40 || Weekly * | ||
|- | |- | ||
|Spend 250000 Stellin || {{Currency|Limited-Time Activeness}} x30 || Event | |Spend 250000 Stellin || {{Currency|Limited-Time Activeness}} x30 || Event | ||
| Line 399: | Line 527: | ||
|Consumed 180 card skill level up material || {{Currency|Limited-Time Activeness}} x50 || Event | |Consumed 180 card skill level up material || {{Currency|Limited-Time Activeness}} x50 || Event | ||
|} | |} | ||
'''Note:''' Weekly reset tasks reset on Thursdays (UTC+9) rather than the standard weekly reset time of Monday 04:00 (UTC+9). | |||
===Cumulative Limited-Time Activeness Rewards=== | ===Cumulative Limited-Time Activeness Rewards=== | ||
As the player accumulates {{Currency|Limited-Time Activeness}}, additional rewards are available as follows: | As the player accumulates {{Currency|Limited-Time Activeness}}, additional rewards are available as follows: | ||
* 50: {{ | * 50: {{Item icon|Sweet Persimmon}} x666 | ||
* 100: {{ | * 100: {{Item icon|Sweet Persimmon}} x666 | ||
* 200: {{ | * 200: {{Item icon|Sweet Persimmon}} x666 | ||
* 300: {{ | * 300: {{Item icon|Sweet Persimmon}} x666 | ||
* 400: {{ | * 400: {{Item icon|Sweet Persimmon}} x2023 | ||
* 500: {{ | * 500: {{Item icon|Sweet Persimmon}} x2023 | ||
* 600: {{ | * 600: {{Item icon|Sweet Persimmon}} x4532 | ||
* 700: {{ | * 700: {{Item icon|Sweet Persimmon}} x4532 | ||
* 800: {{ | * 800: {{Item icon|Sweet Persimmon}} x4532 | ||
* 900: {{ | * 900: {{Item icon|Sweet Persimmon}} x4532 | ||
* 1000: {{ | * 1000: {{Item icon|Sweet Persimmon}} x5888 | ||
* 1100: {{Badge icon|Majestic Tiger Badge}} | * 1100: {{Badge icon|Majestic Tiger Badge}} | ||
* 1200: {{Currency|S-Chip}} x100 | * 1200: {{Currency|S-Chip}} x100 | ||
| Line 419: | Line 549: | ||
===Sweet Persimmon Exchange Shop=== | ===Sweet Persimmon Exchange Shop=== | ||
A total of {{ | A total of {{Item icon|Sweet Persimmon}} x30,726 are available from cumulative rewards above. These can be spent in Mall > Exchange to exchange for the following rewards; note that all ten {{Currency|Tears of Themis - Limited}} must be purchased before moving on to the advanced tab of the shop. | ||
{| class="wikitable" | {| class="wikitable" | ||
| Line 449: | Line 579: | ||
|} | |} | ||
==Mini-Game== | ==Murder Mystery Mini-Game== | ||
[[File:BToR Museum Mini-Game sample.png|thumb]] | |||
This event, running from Jan 21 to Feb 2 UTC+9, is a standard Memory game, in which the player flips over tiles with the goal of finding matches. If matching tiles are found, they are removed; if a match is not found, the tiles are flipped back face-down. There is no limit to the number of match attempts. Players may collect two wins on the matching game per day, with more attempts allowed if a player spends {{Item icon|Mystery Letter}} x1; these are exchanged for {{Currency|S-Chip}} x50 in the Mall during the event duration. | |||
Each board completion awards {{Currency|Stellin}} x3,000 by mail. Additionally, cumulative rewards are available upon the following stage completion counts: | |||
{|class="wikitable" | |||
!Puzzles !! Reward | |||
|- | |||
|2 || {{Currency|Stellin}} x6,666 | |||
|- | |||
|4 || {{Currency|Stellin}} x8,888 | |||
|- | |||
|6 || {{Item icon|Oracle of Justice III}} x20 | |||
|- | |||
|8 || {{Item icon|Oracle of Justice III}} x23 | |||
|- | |||
|10 || {{Item icon|Potential Chip II}} x3 | |||
|- | |||
|12 || {{Item icon|Selection Chip II}} x3 | |||
|- | |||
|14 || {{Badge icon|As You Wish Badge}} | |||
|- | |||
|16 || {{Item icon|Potential Chip III}} x3 | |||
|- | |||
|18 || {{Currency|S-Chip}} x100 | |||
|- | |||
|20 || {{Item icon|Selection Chip III}} x3 | |||
|} | |||
{{Script | |||
|scriptHeader=Intro: Lobby | |||
|characterLinks=You!Main Character,Luke!Luke Pearce,Marius!Marius von Hagen,Artem!Artem Wing,Vyn!Vyn Richter | |||
|collapsed=yes | |||
|script= | |||
A new immersive murder mystery game experience store has opened in the CBD of Stellis City. It is best known for its historical themed scripts. | |||
Since the Spring Festival is around the corner, the NXX Investigation Team members have decided to plan an outing at this store for recreation. | |||
{{SL|You|The have so many beautiful historical costumes here!}} | |||
{{SL|Marius|Miss, would you like to pick your favorite and give it a try? Why don't I wear a matching set with you?}} | |||
{{SL|Vyn|We get to change into historical costumes? Interesting. I have yet to try this before.}} | |||
{{SL|Artem|I've done some research on the history before coming here...}} | |||
{{SL|Luke|A murder mystery game? That's a piece of cake for me! I believe it'll be more exciting with the historical theme!}} | |||
{{SL|You|I agree. Let's see what we need to do to prepare for the game.}} | |||
Following the signs, you walk past the distinctive clothing display and reach the guide display for the historically themed section. | |||
To enhance the immersive experience of the players, even the display cabinet has a historically themed design. | |||
{{SL|You|Take a look... Which script should we choose?}} | |||
The different compartments in the wooden cabinet hold a variety of script summaries. | |||
Once a script is selected, the players can proceed to the next step. | |||
{{SL|You|This one looks kind of scary.}} | |||
{{SL|Vyn|The script I am holding seems to be related to multiple identities.}} | |||
{{SL|Artem|Mine... seems to be an alternate universe historical setting?}} | |||
{{SL|Luke|Haha, I believe this one in my hand will be comical.}} | |||
{{SL|Marius|I can go with any script.}} | |||
{{SL|You|So, what's our choice?}} | |||
{{SL|You|Why are all of you staring at me? Are you leaving this decision to me?}} | |||
All four of them reply in the affirmative. They want you to pick the script. | |||
You spend a long time glancing through the script summaries. Finally, you pick one that is relatively safe, which you think everyone will agree on. | |||
{{SL|Artem|A historical romance? Are you keen to try an emotional murder mystery script?}} | |||
{{SL|You|Yes! I'm sure if will be interesting to change into the historical costumes and put our emotions into the story while playing.}} | |||
{{SL|Marius|I want to be your partner, Miss!}} | |||
{{SL|Luke|That's not up to you. See that box over there? There are identity cards inside. Everyone draws one to determine their roles.}} | |||
{{SL|Vyn|Draw a card? I believe Lady Luck is always on my side.}} | |||
{{SL|Marius|...}} | |||
{{SL|You|Come on, let's pick the identity cards! I'm excited to see what roles we'll be playing!}} | |||
}} | |||
{{Script | |||
|scriptHeader=After solving first puzzle | |||
|collapsed=yes | |||
|script= | |||
Everyone takes turns to pick a card. Next, you all gather to talk about the roles. | |||
{{SL|You|How did it go? What's your role?}} | |||
{{SL|Vyn|I think I am... a spirit?}} | |||
{{SL|Vyn|Looks like I will need to research more on the historical legends about spirits.}} | |||
{{SL|You|Dr. Richter, your role sounds interesting, and it does suit you as you always give off a mysterious vibe.}} | |||
{{SL|Luke|I'm... a thief?}} | |||
{{SL|You|Gosh... Isn't it entirely opposite to your current occupation?}} | |||
{{SL|Luke|Well, at least it's still a righteous character.}} | |||
{{SL|Marius|Are you sure? Murder mystery games are all about deception.}} | |||
{{SL|Luke|I'm serious. You gotta trust me.}} | |||
{{SL|You|Let's see how you perform, then. How about you, Marius?}} | |||
{{SL|Marius|I'm a famous prince.}} | |||
{{SL|You|That does suit you.}} | |||
{{SL|You|What about Mr. Wing? What's your role?}} | |||
{{SL|Artem|I'm an upstanding official.}} | |||
{{SL|You|That's not unexpected from you.}} | |||
{{SL|Artem|But I'm also good at lying.}} | |||
{{SL|You|So, is this sentence a lie too?}} | |||
Everyone falls silent and seems to be thinking about the paradox in the conversation. | |||
{{SL|Luke|Hold on... You haven't told us what you got.}} | |||
{{SL|Vyn|Indeed, the most important person has yet to tell her role.}} | |||
Marius and Artem look in your direction, waiting for you to reveal the answer. | |||
{{SL|You|Actually...}} | |||
{{SL|You|Actually, I'm not sure what's my role.}} | |||
{{SL|Luke|Huh? Are you purposely keeping it a secret?}} | |||
{{SL|Marius|Miss, are you going to start lying now?}} | |||
{{SL|Vyn|Looks like you are testing our observational skills.}} | |||
{{SL|Artem|I believe she is just keeping it a secret.}} | |||
You can't help but laugh when you notice the four of them talking about your role. | |||
You are confident that they can never guess it. | |||
{{SL|You|There's no point in guessing. You will know when the time comes.}} | |||
{{SL|You|Let's go! It's time for the next part.}} | |||
~END~ | |||
}} | |||
==Rewards and Campaigns== | ==Rewards and Campaigns== | ||
===Blizzardous Threads of Red: Event Shadow of Themis=== | ===Blizzardous Threads of Red: Event Shadow of Themis=== | ||
From Jan 12 to Feb 2, an event Shadow of Themis will be available. Visions may be drawn from these event banners using {{Currency|Tears of Themis - Limited}} and {{Currency|Tears of Themis - Earthly}}. If present, {{Currency|Tears of Themis - Limited}} will be consumed first. | From Jan 12 to Feb 2, an event Shadow of Themis will be available. Visions may be drawn from these event banners using {{Currency|Tears of Themis - Limited}} and {{Currency|Tears of Themis - Earthly}}. If present, {{Currency|Tears of Themis - Limited}} will be consumed first. | ||
| Line 468: | Line 709: | ||
====Special Discounted 10-pulls==== | ====Special Discounted 10-pulls==== | ||
Note that the first '''four''' 10-pulls on these banners are available at a discounted rate of 8 tears each rather than 10. This effectively reduces the cost of a 10-pull to {{Currency|S-Chip}} x1,440 four times | Note that the first '''four''' 10-pulls on these banners are available at a discounted rate of 8 tears each rather than 10. This effectively reduces the cost of a 10-pull to {{Currency|S-Chip}} x1,440 four times. | ||
====[[File:Trace of Tears - Earthly icon.png|35px|link=]] Trace of Tears - Earthly Exchange Shop==== | ====[[File:Trace of Tears - Earthly icon.png|35px|link=]] Trace of Tears - Earthly Exchange Shop==== | ||
| Line 524: | Line 765: | ||
===Stationery Shop Event Exchange=== | ===Stationery Shop Event Exchange=== | ||
During the event, accumulate certain amounts of {{ | During the event, accumulate certain amounts of {{Item icon|Holly Stationery}} to exchange for the limited invitation [[File:Manor Mystery Invitation preview.png|x24px|link=Manor Mystery]] [[Manor Mystery]], {{Currency|Tears of Themis - Limited}}, and other generous rewards at the Stationery Shop. Note that the entire "Basic Exchange" shop must be cleared before proceeding to the "Advanced Exchange." | ||
It will take a total of {{ | It will take a total of {{Item icon|Holly Stationery}} x38,900 to fully clear the Stationery Shop; note that achieving this total requires playing through the event fully and may be difficult to reach for players starting the event late. Additionally, as there are only a finite number of {{Item icon|Holly Stationery}} available, players should take caution when purchasing the "infinitely available" Stellin and Oracles. | ||
{{Tab/start}} | {{Tab/start}} | ||
| Line 740: | Line 981: | ||
## Have not activated Returner Tasks for at least 60 days | ## Have not activated Returner Tasks for at least 60 days | ||
# Every returning attorney can only bind one Returner Code. No changes can be made after binding. Returner Code can only be used once, and players cannot use their own Returner Codes. | # Every returning attorney can only bind one Returner Code. No changes can be made after binding. Returner Code can only be used once, and players cannot use their own Returner Codes. | ||
# Successfully link a Returner Code to obtain {{Currency|Tears of Themis - Limited}} and | # Successfully link a Returner Code to obtain {{Currency|Tears of Themis - Limited}} x2, {{Currency|Stellin}} x20,000, and {{Item icon|Oracle of Justice IV}} x20. | ||
After linking the code, Returning players may proceed to the "For Current Players" section above to share their own codes and claim more rewards, and they may also take advantage of the more generalized [[Returner Program]]. | After linking the code, Returning players may proceed to the "For Current Players" section above to share their own codes and claim more rewards, and they may also take advantage of the more generalized [[Returner Program]]. | ||
===Mall Event Items=== | ===Mall Event Items=== | ||
====Privilege Packs==== | |||
{{Mall pack table | |||
|packs= | |||
{{Mall pack | |||
|name=Blizzardous Privilege Pack | |||
|item1={{Currency|Tears of Themis - Earthly}} x1 | |||
|price={{Currency|Gem}} x5 | |||
|limit=5/account | |||
}} | |||
}} | |||
====Event Packs==== | |||
{{Mall pack table | |||
|packs= | |||
{{Mall pack | |||
|name=Blizzardous Vision Pack I | |||
|item1={{Currency|Tears of Themis - Earthly}} x1 | |||
|item2={{Currency|Stellin}} x5000 | |||
|item3={{Item icon|Oracle of Justice IV}} x5 | |||
|price=$0.99 | |||
|limit=8/account | |||
}} | |||
{{Mall pack | |||
|name=Blizzardous Vision Pack II | |||
|item1={{Currency|Tears of Themis - Earthly}} x5 | |||
|item2={{Item icon|Logic Chip II}} x3 | |||
|item3={{Item icon|Empathy Chip II}} x3 | |||
|item4={{Item icon|Intuition Chip II}} x3 | |||
|price=$5.99 | |||
|limit=3/account | |||
}} | |||
{{Mall pack | |||
|name=Blizzardous Vision Pack III | |||
|item1={{Currency|S-Chip}} x50 | |||
|item2={{Currency|Tears of Themis - Earthly}} x10 | |||
|price=$11.99 | |||
|limit=2/account | |||
}} | |||
{{Mall pack | |||
|name=Blizzardous Vision Pack IV | |||
|item1={{Currency|S-Chip}} x100 | |||
|item2={{Currency|Tears of Themis - Earthly}} x13 | |||
|price=$19.99 | |||
|limit=2/account | |||
}} | |||
{{Mall pack | |||
|name=Blizzardous Vision Pack V | |||
|item1={{Currency|S-Chip}} x300 | |||
|item2={{Currency|Tears of Themis - Earthly}} x23 | |||
|price=$39.99 | |||
|limit= | |||
}} | |||
{{Mall pack | |||
|name=Blizzardous Special Offer Pack I | |||
|item1={{Currency|Tears of Themis - Earthly}} x3 | |||
|item2={{Item icon|Energy Drink Basic Pack}} x1 | |||
|price={{Currency|Gem}} x27 | |||
|limit=4/account | |||
}} | |||
{{Mall pack | |||
|name=Blizzardous Special Offer Pack II | |||
|item1={{Currency|Tears of Themis - Earthly}} x10 | |||
|item2={{Currency|Stellin}} x20000 | |||
|item3={{Item icon|Oracle of Justice IV}} x20 | |||
|price={{Currency|Gem}} x118 | |||
|limit=3/account | |||
}} | |||
{{Mall pack | |||
|name=Blizzardous Special Offer Pack III | |||
|item1={{Currency|Tears of Themis - Earthly}} x20 | |||
|item2={{Currency|Stellin}} x50000 | |||
|item3={{Item icon|Oracle of Justice IV}} x35 | |||
|price={{Currency|Gem}} x228 | |||
|limit=1/account | |||
}} | |||
}} | |||
====Time-Limited Packs==== | |||
'''Note:''' The Holly Stationery and Sweet Persimmon packs are available for 72h after the event ends to facilitate final purchases in the two events' exchange shops. | |||
{{Mall pack table | |||
|packs= | |||
{{Mall pack | |||
|name=Blizzardous Wish Box | |||
|image=Snowfallen Wish Box.png | |||
|item1={{Item icon|Blizzardous Wish Box}} x1 | |||
|price=Free | |||
|limit=1/day | |||
}} | |||
{{Mall pack | |||
|name=Blizzardous Special Wish Box | |||
|image=Snowfallen Wish Box.png | |||
|item1={{Item icon|Blizzardous Wish Box}} x1 | |||
|price=Free | |||
|limit=1/day | |||
}} | |||
{{Mall pack | |||
|name=Earthly Wish Box | |||
|image=Snowfallen Wish Box.png | |||
|item1={{Item icon|Earthly Wish Box}} x1 | |||
|price={{Currency|Gem}} x1 | |||
|limit=100/account | |||
}} | |||
{{Mall pack | |||
|name=Fruit of Fortune Pack | |||
|item1={{Item icon|Sweet Persimmon}} x2023 | |||
|price=$0.99 | |||
|limit=1/account | |||
}} | |||
{{Mall pack | |||
|name=Fruitful Year Pack | |||
|item1={{Item icon|Sweet Persimmon}} x4532 | |||
|price=$3.99 | |||
|limit=5/account | |||
}} | |||
{{Mall pack | |||
|name=Fruitfillment Pack | |||
|item1={{Item icon|Sweet Persimmon}} x10000 | |||
|price=$7.99 | |||
|limit=6/account | |||
}} | |||
{{Mall pack | |||
|name=Holly Stationery Pack I | |||
|item1={{Item icon|Holly Stationery}} x2500 | |||
|price=$2.99 | |||
|limit=5/account | |||
}} | |||
{{Mall pack | |||
|name=Holly Stationery Pack II | |||
|item1={{Item icon|Holly Stationery}} x12,000 | |||
|price=$12.99 | |||
|limit=3/account | |||
}} | |||
{{Mall pack | |||
|name=Vision Material Pack | |||
|image=Vision Material Pack (2022).png | |||
|item1={{Item icon|Vision Chip II}} x5 | |||
|item2={{Item icon|Vision Chip III}} x5 | |||
|item3={{Item icon|Wide-Angle Lens}} x6 | |||
|item4={{Item icon|Bag of Dried Figs}} x6 | |||
|item5={{Item icon|Multipurpose Military Knife}} x6 | |||
|item6={{Item icon|Pill Organizer}} x6 | |||
|item7={{Item icon|Poetry Collection}} x6 | |||
|item8={{Item icon|Smart Glasses}} x6 | |||
|item9={{Currency|Stellin}} x50000 | |||
|price={{Currency|Gem}} x9 | |||
|limit=6/account | |||
}} | |||
{{Mall pack | |||
|name=Equalization Material Pack | |||
|image=Equalization Material Pack (2022).png | |||
|item1={{Item icon|Equalization Chip II}} x5 | |||
|item2={{Item icon|Equalization Chip III}} x5 | |||
|item3={{Item icon|Fountain Pen}} x6 | |||
|item4={{Item icon|Tablet}} x6 | |||
|item5={{Item icon|Tie Clip}} x6 | |||
|item6={{Item icon|Sapphire Cufflinks}} x6 | |||
|item7={{Item icon|Senior Attorney's Badge}} x6 | |||
|item8={{Item icon|Model Handgun}} x6 | |||
|item9={{Currency|Stellin}} x50000 | |||
|price={{Currency|Gem}} x9 | |||
|limit=6/account | |||
}} | |||
{{Mall pack | |||
|name=Mind Material Pack | |||
|image=Mind Material Pack (2022).png | |||
|item1={{Item icon|Mind Chip II}} x5 | |||
|item2={{Item icon|Mind Chip III}} x5 | |||
|item3={{Item icon|Vinyl Record}} x6 | |||
|item4={{Item icon|Wooden Gardening Spade}} x6 | |||
|item5={{Item icon|Voice Recorder}} x6 | |||
|item6={{Item icon|Pocket Watch}} x6 | |||
|item7={{Item icon|Gilded Poker Cards}} x6 | |||
|item8={{Item icon|Ceramic Tea Cup}} x6 | |||
|item9={{Currency|Stellin}} x50000 | |||
|price={{Currency|Gem}} x9 | |||
|limit=6/account | |||
}} | |||
{{Mall pack | |||
|name=Infinity Material Pack | |||
|image=Infinity Material Pack (2022).png | |||
|item1={{Item icon|Infinity Chip II}} x5 | |||
|item2={{Item icon|Infinity Chip III}} x5 | |||
|item3={{Item icon|Oil-Painting Tools}} x6 | |||
|item4={{Item icon|Block Component}} x6 | |||
|item5={{Item icon|Touch Stylus}} x6 | |||
|item6={{Item icon|Bluetooth Earpiece}} x6 | |||
|item7={{Item icon|Stud Earring}} x6 | |||
|item8={{Item icon|Pass Key}} x6 | |||
|item9={{Currency|Stellin}} x50000 | |||
|price={{Currency|Gem}} x9 | |||
|limit=6/account | |||
}} | |||
}} | |||
====Limited-Time Cosmetics==== | ====Limited-Time Cosmetics==== | ||
From Jan 12 to Feb 2, "Blizzardous" themed [[Visit Invitation Backgrounds]] and [[Visit Invitation Outfits]] will be available in the Cosmetics shop. | From Jan 12 to Feb 2, "Blizzardous" themed [[Visit Invitation Backgrounds]] and [[Visit Invitation Outfits]] will be available in the Cosmetics shop. | ||
{| class="wikitable" | |||
! Outfit || Name and Cost (USD) || Outfit || Name and Cost (USD) | |||
|- | |||
|{{Visit outfit icon|Luke - Blizzardous|size=100px|notext=true}} || '''Luke - Blizzardous'''<br /><br />$9.99 | |||
|{{Visit outfit icon|Artem - Blizzardous|size=100px|notext=true}} || '''Artem - Blizzardous'''<br /><br />$9.99 | |||
|- | |||
|{{Visit outfit icon|Vyn - Blizzardous|size=100px|notext=true}} || '''Vyn - Blizzardous'''<br /><br />$9.99 | |||
|{{Visit outfit icon|Marius - Blizzardous|size=100px|notext=true}} || '''Marius - Blizzardous'''<br /><br />$9.99 | |||
|- | |||
|{{Visit BG icon|Old Manor|size=100px|notext=true}} || '''Old Manor'''<br /><br />$4.99 | |||
|{{Visit BG icon|Stage|size=100px|notext=true}} || '''Stage'''<br /><br />$4.99 | |||
|} | |||
===Stellis Recharge Station=== | ===Stellis Recharge Station=== | ||
| Line 799: | Line 1,254: | ||
|description=Information detailing the Blizzardous Threads of Red Event in Tears of Themis. | |description=Information detailing the Blizzardous Threads of Red Event in Tears of Themis. | ||
}} | }} | ||
[[Category:Events]] | |||
Latest revision as of 22:51, 4 May 2024
| DLC Re-release Available!
You are viewing the page for a limited-time event that has since ended and been re-released as permanent DLC. Some of the information below may not apply to the version currently available for play. For the permanent version of this content, see Blizzardous Threads of Red (DLC) |

| Blizzardous Threads of Red | |
|---|---|
| Start Date | 2023-01-12 11:00 UTC +9 |
| End Date | 2023-02-02 04:00 UTC +9 |
| Duration | Approx. 21 days |
The world is vast, and full of life. But where is the answer to the question of love?
Your only wish is to take hold of his hand, and read with him the story of a lifetime.
Event Phases[edit | edit source]
The event is available in four phases which gradually open more content as time passes. These phases are timed as follows (all times shown in UTC+9):
- Phase 1: Jan 12, 11:00
- Phase 2: Jan 16, 11:00
- Phase 3: Jan 20, 11:00
- Phase 4: Jan 24, 11:00
Prelude: Puzzle Event[edit | edit source]

The first day of the New Year is a lucky day! Welcome the new year with the sound of firecrackers. Go to the temple fair, watch the lion dances, and make your New Year wishes together with your beloved's hand in yours!
From Jan 5-12, complete event quests to receive ![]() Lucky Dumplings and other rewards. Exchange
Lucky Dumplings and other rewards. Exchange ![]() Lucky Dumplings for random Puzzle Pieces to complete the puzzle for additional rewards! The completed puzzle will be added into player's Illustrations collection.
Lucky Dumplings for random Puzzle Pieces to complete the puzzle for additional rewards! The completed puzzle will be added into player's Illustrations collection.
Players who complete all available tasks will receive a total of ![]() Lucky Dumpling x550, which is enough for 36 puzzle piece redemptions. With all tasks complete, players may receive up to 13 duplicate puzzle pieces (as every 5 duplicates refunds one new piece) and still complete the puzzle.
Lucky Dumpling x550, which is enough for 36 puzzle piece redemptions. With all tasks complete, players may receive up to 13 duplicate puzzle pieces (as every 5 duplicates refunds one new piece) and still complete the puzzle.
Quests[edit | edit source]
| Quest | Reward | Frequency |
|---|---|---|
| Log in to the game |
|
Daily |
| Perform 5 interactions in Visit |
|
Daily |
One of the following:
|
Daily | |
One of the following:
|
| |
One of the following:
|
|
Daily |
| Use 480 AP |
|
One-time |
| Use 960 AP |
|
One-time |
| Spend 100,000 Stellin |
|
One-time |
| Spend 200,000 Stellin |
|
One-time |
| Challenge the Temple of Trials 1 time(s) | One-time |
Rewards[edit | edit source]
| Correctly placed Puzzle Pieces | Reward |
|---|---|
| 5 | |
| 10 | |
| 15 | |
| 20 | |
| 25 |
Snowy Mountain: Event Stories[edit | edit source]
During the event, "Snowy Mountain" Main Story and Side Story tasks will be available in stages. Complete the tasks to obtain ![]() Holly Stationery,
Holly Stationery, ![]() Tears of Themis - Limited,
Tears of Themis - Limited, ![]() Winter Leaves Badge, event-limited R cards, and more.
Winter Leaves Badge, event-limited R cards, and more.
Main Story[edit | edit source]
Phase 1

- Blizzardous Threads of Red Main Story Prologue
- Blizzardous Threads of Red Main Story 1-1: Villa Guests
- Blizzardous Threads of Red Main Story 1-2: "Accident"
- Blizzardous Threads of Red Main Story 1-3: Suspicious Danger
Phase 2

- Blizzardous Threads of Red Main Story 2-1: Treasure Auction
- Blizzardous Threads of Red Main Story 2-2: Gloomy Villa
- Blizzardous Threads of Red Main Story 2-3: Hidden Bewilderment
Phase 3

- Blizzardous Threads of Red Main Story 3-1: Secluded Villa
- Blizzardous Threads of Red Main Story 3-2: The Third Mystery
- Blizzardous Threads of Red Main Story 3-3: Hidden Door
- Blizzardous Threads of Red Main Story 3-4: Winter Day
Phase 4

- Blizzardous Threads of Red Main Story 4-1: Predicament
- Blizzardous Threads of Red Main Story 4-2: Zangr's Hint
- Blizzardous Threads of Red Main Story 4-3: Winter Night
- Blizzardous Threads of Red Main Story 4-4: Silent Snow
- Blizzardous Threads of Red Main Story 4-5: When the Snow Melts
Side Story[edit | edit source]
Phase 1
- Blizzardous Threads of Red Side Story 1-1: Shantel's Jewelry
- Blizzardous Threads of Red Side Story 1-2: Ben's Secret
- Blizzardous Threads of Red Side Story 1-3: Clean Water
Phase 2
- Blizzardous Threads of Red Side Story 2-1: Inextinguishable
- Blizzardous Threads of Red Side Story 2-2: Cowardly Bernard
- Blizzardous Threads of Red Side Story 2-3: Rey's Worries
Phase 3
- Blizzardous Threads of Red Side Story 3-1: Childhood Candies
- Blizzardous Threads of Red Side Story 3-2: The Lady's Song
- Blizzardous Threads of Red Side Story 3-3: Forever Young
Phase 4
- Blizzardous Threads of Red Side Story 4-1: New Redemption
- Blizzardous Threads of Red Side Story 4-2: Reporter's Professionalism
- Blizzardous Threads of Red Side Story 4-3: Zangr's Next Step
General Exploration[edit | edit source]
Villa Rooms: Artifact and Guest Stories[edit | edit source]
| Location | Residents | ||
|---|---|---|---|
| Chrysanthemum House | Rey Rong |
Sam Zhang |
Nurse Shan |
| Bamboo Pavilion | Mr. Jiang |
Tony |
Ben Yuan |
| Orchid Courtyard | Shantel Pan |
Ashley |
Frederick |
| Plum Study | Casey Cao |
Elijah Yin |
Bernard |
Villa Courtyard: Investigation Gameplay[edit | edit source]
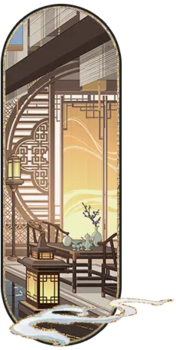
On a snowy winter night, an imposing old manor stands silently in the mountains.
Mevis Zeng, an antique magnate who had rarely been in the spotlight for many years, is planning to host and magnificent treasure auction in this mysterious old manor.
Entrepreneurs, celebrities, small-town residents, tabloid journalists, doctors, academics...
And many seemingly unrelated guests have gathered here for this event. What has attracted all of them to come?
Suddenly, an ear-piercing scream breaks the calm. An accident has happened right before the guests' eyes. Is the legend of the soul-reaping snow beast a truth? Or has someone meticulously planned out this murder?
The snow storm becomes heavier, separating the villa from the rest of the world. What secrets are hidden in this old manor?
And where will the investigation lead the NXX team...?
There are a total of 4 buildings in the Villa Courtyard. Each building has 5 levels. Players are required to team up with NXX members to complete all levels. Each building includes several of the following puzzles. Achieve 100% exploration of the Villa Courtyard to obtain the ![]() Celebration - Blizzardous Namecard.
Celebration - Blizzardous Namecard.
TIP: Some levels are tougher than the others. Players are recommended to complete all levels before returning to the individual buildings to collect the artifacts, keys, and silk pouches.
Phase 1: Ink Study[edit | edit source]

|

|
|
| Fengya | Qiankun | |
|---|---|---|

|

| |
| Wuxuan | Tianxing | Yibian |
Phase 2: Bright Pavilion[edit | edit source]

|

|
|
| North Wing | South Wing | |
|---|---|---|

|

| |
| East Wing | West Wing | Main Hall |
Phase 3: Labyrinth Pavilion[edit | edit source]
|

|
|
| Way of Adversity | Way of Truth | |
|---|---|---|

|
| |
| Way of Mystery | Way of Choices | The Insatiable Journey |
Phase 4: Vault[edit | edit source]

|
|

|
| 1st Try | 2nd Try | |
|---|---|---|
|
| |
| 3rd Try | 4th Try | Final Try |
Event Tasks[edit | edit source]
The event task list is time-gated with the rest of the event into four phases which gradually unlock as the event proceeds.
| Task | Reward |
|---|---|
| Complete all Phase 1 tasks for Blizzardous Threads of Red | |
| Complete Main Story - Snowy Mountain I | |
| Complete Side Story - Shantel's Jewelry (Unlocks on 1/13 after Chapter 1 has been completed) | |
| Complete Side Story - Ben's Secret (Unlocks on 1/14 after Chapter 1 has been completed) | |
| Complete Side Story - Clean Water (Unlocks on 1/15 after Chapter 1 has been completed) | |
| Complete the story of 1 character and their Artifact in Villa Rooms | |
| Complete the stories of 2 characters and their Artifacts in Villa Rooms | |
| Complete a level in Ink Study in Villa Courtyard | |
| Complete all levels in Ink Study in Villa Courtyard | |
| Obtain all Artifacts in Ink Study in Villa Courtyard | |
| Obtain all Keys in Ink Study in Villa Courtyard | |
| Obtain all Silk Pouches in Ink Study in Villa Courtyard |
| Task | Reward |
|---|---|
| Complete all Phase 2 tasks for Blizzardous Threads of Red | |
| Complete Main Story - Snowy Mountain II | |
| Complete Side Story - Inextinguishable (Unlocks on 1/17 after previous Side Story has been completed) | |
| Complete Side Story - Cowardly Bernard (Unlocks on 1/18 after Chapter 2 has been completed) | |
| Complete Side Story - Rey's Worries (Unlocks on 1/19 after previous Side Story has been completed) | |
| Complete the stories of 3 characters and their Artifacts in Villa Rooms | |
| Complete the stories of 4 characters and their Artifacts in Villa Rooms | |
| Complete a level in Bright Pavilion in Villa Courtyard | |
| Complete all levels in Bright Pavilion in Villa Courtyard | |
| Obtain all Artifacts in Bright Pavilion in Villa Courtyard | |
| Obtain all Keys in Bright Pavilion in Villa Courtyard | |
| Obtain all Silk Pouches in Bright Pavilion in Villa Courtyard |
| Task | Reward |
|---|---|
| Complete all Phase 3 tasks for Blizzardous Threads of Red | |
| Complete Main Story - Snowy Mountain III | |
| Complete Side Story - Childhood Candies (Unlocks on 1/21 after Chapter 3 has been completed) | |
| Complete Side Story - The Lady's Song (Unlocks on 1/22 after previous Side Story has been completed) | |
| Complete Side Story - Forever Young (Unlocks on 1/23 after Chapter 3 has been completed) | |
| Complete the stories of 5 characters and their Artifacts in Villa Rooms | |
| Complete the stories of 6 characters and their Artifacts in Villa Rooms | |
| Complete a level in the Labyrinth Pavilion in Villa Courtyard | |
| Complete all levels in the Labyrinth Pavilion in Villa Courtyard | |
| Obtain all Artifacts in Labyrinth Pavilion in Villa Courtyard | |
| Obtain all Keys in Labyrinth Pavilion in Villa Courtyard | |
| Obtain all Silk Pouches in Labyrinth Pavilion in Villa Courtyard |
| Task | Reward |
|---|---|
| Complete all Phase 4 tasks for Blizzardous Threads of Red | |
| Complete all Main Story Tasks | |
| Complete all Side Story Tasks | |
| Complete Main Story - Snowy Mountain IV | |
| Complete Side Story - New Redemption (Unlocks on 1/25 after Chapter 4 has been completed) | |
| Complete Side Story - Reporter's Professionalism (Unlocks on 1/26 after Chapter 4 has been completed) | |
| Complete Side Story Zangr's Next Step (Unlocks on 1/27 after Chapter 4 has been completed) | |
| Complete the stories of 7 characters and their Artifacts in Villa Rooms | |
| Complete the stories of 8 characters and their Artifacts in Villa Rooms | |
| Complete a level in the Vault in Villa Courtyard | |
| Complete all levels in the Vault in Villa Courtyard | |
| Obtain all Artifacts in the Vault in Villa Courtyard | |
| Obtain all Keys in the Vault in Villa Courtyard | |
| Obtain all Silk Pouches in the Vault in Villa Courtyard |
Another Year With You - Event SR Rerun[edit | edit source]
From Jan 12 to Feb 2, an event will be available rerunning past event SRs, awarding ![]() Tears of Themis - Limited, the
Tears of Themis - Limited, the ![]() Majestic Tiger Badge, and other rewards.
Majestic Tiger Badge, and other rewards.
Completion of all available tasks yields a total of ![]() Limited-Time Activeness x1385, which is 85 more than necessary to obtain all rewards, so players may select a few high-AP or highly resource-intensive tasks to leave undone.
Limited-Time Activeness x1385, which is 85 more than necessary to obtain all rewards, so players may select a few high-AP or highly resource-intensive tasks to leave undone.
| Task | Reward | Frequency |
|---|---|---|
| Log in to the game | Daily | |
One of the following:
|
Daily | |
| Complete 6 Anomaly Investigation levels | Daily | |
| Complete 9 Anomaly Investigation levels | Daily | |
| Use 750 AP | Weekly * | |
| Use 1000 AP | Weekly * | |
| Use 1250 AP | Weekly * | |
| Complete 10 daily jobs in Fieldwork | Weekly * | |
| Complete 15 daily jobs in Fieldwork | Weekly * | |
| Complete 20 daily jobs in Fieldwork | Weekly * | |
| Spend 250000 Stellin | Event | |
| Spend 500000 Stellin | Event | |
| Spend 1000000 Stellin | Event | |
| Consumed 30 card evolution or upgrade material | Event | |
| Consumed 90 card evolution or upgrade material | Event | |
| Consumed 150 card evolution or upgrade material | Event | |
| Consumed 90 card skill level up material | Event | |
| Consumed 180 card skill level up material | Event |
Note: Weekly reset tasks reset on Thursdays (UTC+9) rather than the standard weekly reset time of Monday 04:00 (UTC+9).
Cumulative Limited-Time Activeness Rewards[edit | edit source]
As the player accumulates ![]() Limited-Time Activeness, additional rewards are available as follows:
Limited-Time Activeness, additional rewards are available as follows:
- 50:
 Sweet Persimmon x666
 - 100: Sweet Persimmon x666
- 200: Sweet Persimmon x666
- 300: Sweet Persimmon x666
- 400: Sweet Persimmon x2023
- 500: Sweet Persimmon x2023
- 600: Sweet Persimmon x4532
- 700: Sweet Persimmon x4532
- 800: Sweet Persimmon x4532
- 900: Sweet Persimmon x4532
- 1000: Sweet Persimmon x5888
- 1100:
 Majestic Tiger Badge
 - 1200:
 S-Chip x100
 - 1300: S-Chip x100
Sweet Persimmon Exchange Shop[edit | edit source]
A total of ![]() Sweet Persimmon x30,726 are available from cumulative rewards above. These can be spent in Mall > Exchange to exchange for the following rewards; note that all ten
Sweet Persimmon x30,726 are available from cumulative rewards above. These can be spent in Mall > Exchange to exchange for the following rewards; note that all ten ![]() Tears of Themis - Limited must be purchased before moving on to the advanced tab of the shop.
Tears of Themis - Limited must be purchased before moving on to the advanced tab of the shop.
| Item | Cost | Limit |
|---|---|---|
| 10 | ||
| 1 | ||
| 1 | ||
| 1 | ||
| 1 | ||
| 1 | ||
| 1 | ||
| 1 | ||
| 1 | ||
| 4 | ||
| Unlimited | ||
| Unlimited |
Murder Mystery Mini-Game[edit | edit source]

This event, running from Jan 21 to Feb 2 UTC+9, is a standard Memory game, in which the player flips over tiles with the goal of finding matches. If matching tiles are found, they are removed; if a match is not found, the tiles are flipped back face-down. There is no limit to the number of match attempts. Players may collect two wins on the matching game per day, with more attempts allowed if a player spends ![]() Mystery Letter x1; these are exchanged for
Mystery Letter x1; these are exchanged for ![]() S-Chip x50 in the Mall during the event duration.
S-Chip x50 in the Mall during the event duration.
Each board completion awards ![]() Stellin x3,000 by mail. Additionally, cumulative rewards are available upon the following stage completion counts:
Stellin x3,000 by mail. Additionally, cumulative rewards are available upon the following stage completion counts:
| Puzzles | Reward |
|---|---|
| 2 | |
| 4 | |
| 6 | |
| 8 | |
| 10 | |
| 12 | |
| 14 | |
| 16 | |
| 18 | |
| 20 |
A new immersive murder mystery game experience store has opened in the CBD of Stellis City. It is best known for its historical themed scripts.
Since the Spring Festival is around the corner, the NXX Investigation Team members have decided to plan an outing at this store for recreation.
You: The have so many beautiful historical costumes here!
Marius: Miss, would you like to pick your favorite and give it a try? Why don't I wear a matching set with you?
Vyn: We get to change into historical costumes? Interesting. I have yet to try this before.
Artem: I've done some research on the history before coming here...
Luke: A murder mystery game? That's a piece of cake for me! I believe it'll be more exciting with the historical theme!
You: I agree. Let's see what we need to do to prepare for the game.
Following the signs, you walk past the distinctive clothing display and reach the guide display for the historically themed section.
To enhance the immersive experience of the players, even the display cabinet has a historically themed design.
You: Take a look... Which script should we choose?
The different compartments in the wooden cabinet hold a variety of script summaries.
Once a script is selected, the players can proceed to the next step.
You: This one looks kind of scary.
Vyn: The script I am holding seems to be related to multiple identities.
Artem: Mine... seems to be an alternate universe historical setting?
Luke: Haha, I believe this one in my hand will be comical.
Marius: I can go with any script.
You: So, what's our choice?
You: Why are all of you staring at me? Are you leaving this decision to me?
All four of them reply in the affirmative. They want you to pick the script.
You spend a long time glancing through the script summaries. Finally, you pick one that is relatively safe, which you think everyone will agree on.
Artem: A historical romance? Are you keen to try an emotional murder mystery script?
You: Yes! I'm sure if will be interesting to change into the historical costumes and put our emotions into the story while playing.
Marius: I want to be your partner, Miss!
Luke: That's not up to you. See that box over there? There are identity cards inside. Everyone draws one to determine their roles.
Vyn: Draw a card? I believe Lady Luck is always on my side.
Marius: ...
You: Come on, let's pick the identity cards! I'm excited to see what roles we'll be playing!
Everyone takes turns to pick a card. Next, you all gather to talk about the roles.
You: How did it go? What's your role?
Vyn: I think I am... a spirit?
Vyn: Looks like I will need to research more on the historical legends about spirits.
You: Dr. Richter, your role sounds interesting, and it does suit you as you always give off a mysterious vibe.
Luke: I'm... a thief?
You: Gosh... Isn't it entirely opposite to your current occupation?
Luke: Well, at least it's still a righteous character.
Marius: Are you sure? Murder mystery games are all about deception.
Luke: I'm serious. You gotta trust me.
You: Let's see how you perform, then. How about you, Marius?
Marius: I'm a famous prince.
You: That does suit you.
You: What about Mr. Wing? What's your role?
Artem: I'm an upstanding official.
You: That's not unexpected from you.
Artem: But I'm also good at lying.
You: So, is this sentence a lie too?
Everyone falls silent and seems to be thinking about the paradox in the conversation.
Luke: Hold on... You haven't told us what you got.
Vyn: Indeed, the most important person has yet to tell her role.
Marius and Artem look in your direction, waiting for you to reveal the answer.
You: Actually...
You: Actually, I'm not sure what's my role.
Luke: Huh? Are you purposely keeping it a secret?
Marius: Miss, are you going to start lying now?
Vyn: Looks like you are testing our observational skills.
Artem: I believe she is just keeping it a secret.
You can't help but laugh when you notice the four of them talking about your role.
You are confident that they can never guess it.
You: There's no point in guessing. You will know when the time comes.
You: Let's go! It's time for the next part.
~END~
Rewards and Campaigns[edit | edit source]
Blizzardous Threads of Red: Event Shadow of Themis[edit | edit source]
From Jan 12 to Feb 2, an event Shadow of Themis will be available. Visions may be drawn from these event banners using ![]() Tears of Themis - Limited and
Tears of Themis - Limited and ![]() Tears of Themis - Earthly. If present,
Tears of Themis - Earthly. If present, ![]() Tears of Themis - Limited will be consumed first.
Tears of Themis - Limited will be consumed first.
- The 4 event-limited SSR cards in this event will be split into 4 Shadows of Themis. Each male lead will have 1 individual Shadow of Themis.
- There will be a total of 4 Event Shadows of Themis in this event. Each Shadow of Themis contains one event-limited SSR card and 3 of the corresponding male lead's other SSR cards. The probability of drawing the event-limited SSR card is 1%. (The total probability of drawing SSR cards is 1.6%.)
- One event-limited SSR card is guaranteed within 100 Visions.
- The guaranteed count is shared among all 4 Shadows of Themis. Every Vision you draw from any of the "Blizzardous Threads of Red" Event Shadows of Themis will be included in the guaranteed pity count for one event-limited SSR per 100 Visions. Once you hit 100 Visions, you will obtain the event-limited SSR of the male lead whose Shadow of Themis you are currently drawing Visions from. Obtaining non-event-limited SSR cards will not reset the guaranteed count.
- The guarantee count for this event Shadow of Themis will not carry over to any other events.
For these banners, "Event limited" SSRs (1% pull rate, guaranteed at 100 pity) are ![]() Luke "Dreamlike Drama",
Luke "Dreamlike Drama", ![]() Artem "The Weeds",
Artem "The Weeds", ![]() Vyn "Burning Embrace", and
Vyn "Burning Embrace", and ![]() Marius "Mirage of You".
Marius "Mirage of You".
Special Discounted 10-pulls[edit | edit source]
Note that the first four 10-pulls on these banners are available at a discounted rate of 8 tears each rather than 10. This effectively reduces the cost of a 10-pull to ![]() S-Chip x1,440 four times.
S-Chip x1,440 four times.
 Trace of Tears - Earthly Exchange Shop[edit | edit source]
Players will obtain ![]() Trace of Tears - Earthly x1 for every pull on the event Shadow of Themis. This currency may be exchanged at a limited-time shop for further resources in the Mall's Exchange Tab. After the event ends and the exchange shop closes, unused
Trace of Tears - Earthly x1 for every pull on the event Shadow of Themis. This currency may be exchanged at a limited-time shop for further resources in the Mall's Exchange Tab. After the event ends and the exchange shop closes, unused ![]() Trace of Tears - Earthly will be converted to Stellin at a rate of 1:1000.
Trace of Tears - Earthly will be converted to Stellin at a rate of 1:1000.
| Item | Cost | Limit |
|---|---|---|
| 4 | ||
| 4 | ||
| 4 | ||
| 4 | ||
| 4 | ||
| 4 | ||
| 4 | ||
| 4 | ||
| 3 | ||
| 3 | ||
| 3 | ||
| 3 | ||
| 3 | ||
| 3 | ||
| 3 | ||
| 3 | ||
| 3 | ||
| 3 | ||
| 3 | ||
| 10 | ||
| Unlimited | ||
| Unlimited |
Stationery Shop Event Exchange[edit | edit source]
During the event, accumulate certain amounts of ![]() Holly Stationery to exchange for the limited invitation
Holly Stationery to exchange for the limited invitation ![]() Manor Mystery,
Manor Mystery, ![]() Tears of Themis - Limited, and other generous rewards at the Stationery Shop. Note that the entire "Basic Exchange" shop must be cleared before proceeding to the "Advanced Exchange."
Tears of Themis - Limited, and other generous rewards at the Stationery Shop. Note that the entire "Basic Exchange" shop must be cleared before proceeding to the "Advanced Exchange."
It will take a total of ![]() Holly Stationery x38,900 to fully clear the Stationery Shop; note that achieving this total requires playing through the event fully and may be difficult to reach for players starting the event late. Additionally, as there are only a finite number of
Holly Stationery x38,900 to fully clear the Stationery Shop; note that achieving this total requires playing through the event fully and may be difficult to reach for players starting the event late. Additionally, as there are only a finite number of ![]() Holly Stationery available, players should take caution when purchasing the "infinitely available" Stellin and Oracles.
Holly Stationery available, players should take caution when purchasing the "infinitely available" Stellin and Oracles.
| Item | Cost | Limit |
|---|---|---|
| 5 | ||
| 10 | ||
| 10 | ||
| 15 | ||
| 3 | ||
| 3 | ||
| 3 | ||
| 3 | ||
| 3 | ||
| 3 | ||
| 3 | ||
| 3 | ||
| 3 | ||
| 3 | ||
| 3 |
| Item | Cost | Limit |
|---|---|---|
| 1 | ||
| 15 | ||
| 15 | ||
| 3 | ||
| 3 | ||
| 3 | ||
| 3 | ||
| 3 | ||
| 3 | ||
| 3 | ||
| 3 | ||
| 3 | ||
| 3 | ||
| 3 | ||
| Unlimited | ||
| Unlimited |
Time-Limited Total Purchase Event[edit | edit source]

From Jan 12 to Feb 2, the Time-Limited Total Purchases spending event tracks cumulative purchases via "P-Points" ($1 USD is roughly equivalent to 6 P-Points). Players unlock certain rewards at various levels of P-Points, mainly revolving around the limited SSR ![]() Marius "Engravings" and
Marius "Engravings" and ![]() Tears of Themis - Earthly.
Tears of Themis - Earthly.
| Purchase Level | Total P-Points | USD | Rewards |
|---|---|---|---|
| 1 | 1 | $0.17 |
|
| 2 | 12 | $2 |
|
| 3 | 36 | $6 |
|
| 4 | 68 | $11.33 |
|
| 5 | 128 | $21.33 |
|
| 6 | 198 | $33 |
|
| 7 | 288 | $48 |
|
| 8 | 398 | $66.33 | |
| 9 | 528 | $88 |
|
| 10 | 668 | $111.33 |
|
| 11 | 828 | $138 |
|
| 12 | 988 | $164.67 |
|
Returner Gifts[edit | edit source]

From Jan 12 to Feb 2, participate to obtain ![]() Tears of Themis - Limited and other Returner Gifts!
Tears of Themis - Limited and other Returner Gifts!
For Current Players[edit | edit source]
- Every attorney can obtain their exclusive Returner Code from the "Invite Friend" event page. You may tap on "Copy" or "Share Returner Code" button to share your exclusive Returner Code.
- Your Returner Code will be successfully linked when you invite returning Attorneys who fulfill all the conditions listed in the section below.
- Complete Returner Tasks to obtain
 Tears of Themis - Limited. The "Share Returner Code 1 time" task will be refreshed every Monday at 04:00 (UTC+9). Tap the "Share Returner Code" button and successfully share your code to complete the task.
Note: Invitation Rewards will be sent to the in-game Mailbox after tapping the "Claim" button. There may be a slight delay.
| Task | Reward | Limit |
|---|---|---|
| Share your Returner Code | Weekly | |
| Called 1 friend(s) back | Event | |
| Called 2 friend(s) back | Event | |
| Called 3 friend(s) back | Event |
For Returning Players[edit | edit source]
- Attorneys fulfilling the below requirements can use a friend's personal Returner Code in the event page
- Created the game account before 2023-01-07 23:59:59 (UTC+9)
- Have not logged in to the game for more than 45 days
- Account level is more than 10
- Have cleared Main Story level 01-13
- Have not activated Returner Tasks for at least 60 days
- Every returning attorney can only bind one Returner Code. No changes can be made after binding. Returner Code can only be used once, and players cannot use their own Returner Codes.
- Successfully link a Returner Code to obtain Tears of Themis - Limited x2,
 Stellin x20,000, and
  Oracle of Justice IV x20.
After linking the code, Returning players may proceed to the "For Current Players" section above to share their own codes and claim more rewards, and they may also take advantage of the more generalized Returner Program.
Mall Event Items[edit | edit source]
Privilege Packs[edit | edit source]
| Pack Name | Contents | Price (USD) | Limit |
|---|---|---|---|
 Blizzardous Privilege Pack |
|
5/account |
Event Packs[edit | edit source]
| Pack Name | Contents | Price (USD) | Limit |
|---|---|---|---|
 Blizzardous Vision Pack I |
|
$0.99 | 8/account |
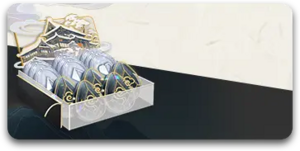 Blizzardous Vision Pack II |
|
$5.99 | 3/account |
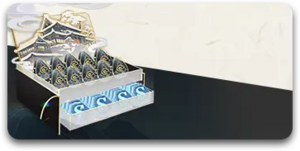 Blizzardous Vision Pack III |
|
$11.99 | 2/account |
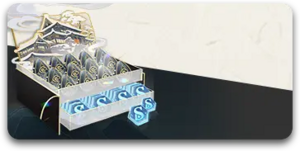 Blizzardous Vision Pack IV |
|
$19.99 | 2/account |
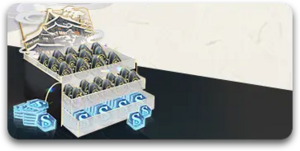 Blizzardous Vision Pack V |
|
$39.99 | |
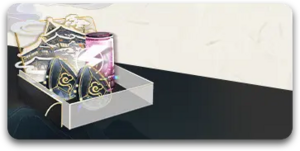 Blizzardous Special Offer Pack I |
|
4/account | |
 Blizzardous Special Offer Pack II |
|
3/account | |
 Blizzardous Special Offer Pack III |
|
1/account |
Time-Limited Packs[edit | edit source]
Note: The Holly Stationery and Sweet Persimmon packs are available for 72h after the event ends to facilitate final purchases in the two events' exchange shops.
| Pack Name | Contents | Price (USD) | Limit |
|---|---|---|---|
 Blizzardous Wish Box |
Free | 1/day | |
Blizzardous Special Wish Box |
Free | 1/day | |
Earthly Wish Box |
100/account | ||
 Fruit of Fortune Pack |
|
$0.99 | 1/account |
 Fruitful Year Pack |
|
$3.99 | 5/account |
 Fruitfillment Pack |
|
$7.99 | 6/account |
 Holly Stationery Pack I |
|
$2.99 | 5/account |
 Holly Stationery Pack II |
|
$12.99 | 3/account |
 Vision Material Pack |
|
6/account | |
 Equalization Material Pack |
|
6/account | |
 Mind Material Pack |
|
6/account | |
 Infinity Material Pack |
|
6/account |
Limited-Time Cosmetics[edit | edit source]
From Jan 12 to Feb 2, "Blizzardous" themed Visit Invitation Backgrounds and Visit Invitation Outfits will be available in the Cosmetics shop.
| Outfit | Name and Cost (USD) | Outfit | Name and Cost (USD) |
|---|---|---|---|
| Luke - Blizzardous $9.99 |
Artem - Blizzardous $9.99 | ||
| Vyn - Blizzardous $9.99 |
Marius - Blizzardous $9.99 | ||
| Old Manor $4.99 |
Stage $4.99 |
Stellis Recharge Station[edit | edit source]
The Recharge Station system offers three packs which functions as a mini "monthly card" -- a player makes a purchase but must continue to log in daily for a period of time to receive the rewards. Like the monthly card, stacking multiple recharge packs will extend the duration of the bonus but not the daily reward (for example, if one purchases three instances of the Tears of Themis - Earthly pack, the reward becomes 1/day for 15 days, not 3/day for 5 days).
| Pack Name | Contents | Price (USD) | Limit |
|---|---|---|---|
 Tears of Themis - Earthly |
|
$3.99 | 3/account |
 S-Chip |
|
$3.99 | 3/account |
 Energy Drink |
|
$2.99 | 2/account |
References[edit | edit source]
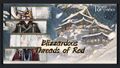
Event teaser