Symphony of the Night Event: Difference between revisions
imported>QueenLunaFreed |
No edit summary |
||
| (46 intermediate revisions by 3 users not shown) | |||
| Line 1: | Line 1: | ||
{{#vardefine:bannerOverride | Symphony of the Night Event banner.png }} | |||
{{#invoke:CargoQuery|main | |||
|q?tables=Event | |||
|q?fields=name=name,startDate=startDate,endDate=endDate,promoImage=promoImage | |||
|q?where=name="Symphony of the Night" | |||
|template=Event infobox | |||
|q?limit=1 | |||
}} | |||
''<p>At midnight, a splendid symphony has already begun.<br>'' | ''<p>At midnight, a splendid symphony has already begun.<br>'' | ||
''Accept this contract and set the stage for a journey through mysterious urban legends...</p>'' | ''Accept this contract and set the stage for a journey through mysterious urban legends...</p>'' | ||
| Line 49: | Line 56: | ||
*Refute 20 Empathy arguments<br />''"Logic" is your most trustworthy weapon''<br />{{Item icon|Empathy Impression II}} x20 | *Refute 20 Empathy arguments<br />''"Logic" is your most trustworthy weapon''<br />{{Item icon|Empathy Impression II}} x20 | ||
::Complete [[Legal Studies#Crisis|Crisis Intervention]] if needed or see [[#Efficiency Guide|Efficiency Guide]] below | ::Complete [[Legal Studies#Crisis|Crisis Intervention]] if needed or see [[#Efficiency Guide|Efficiency Guide]] below | ||
*Use 30 Vyn cards in debates<br />''"It is my honor to assist you."'' | *Use 30 Vyn cards in debates<br />''"It is my honor to assist you."''<br />{{Item icon|Voice Recorder}} x20 | ||
*Debate with Pedro<br />''Pay an occasional visit to an "old acquaintance"''<br />{{Item icon|Oracle of Justice IV}} x10 | *Debate with Pedro<br />''Pay an occasional visit to an "old acquaintance"''<br />{{Item icon|Oracle of Justice IV}} x10 | ||
::Complete [[Main Story 01-02]], [[Main Story 01-16]], or [[Anomaly Level 01-16]] | ::Complete [[Main Story 01-02]], [[Main Story 01-16]], or [[Anomaly Level 01-16]] | ||
| Line 59: | Line 66: | ||
|header=[[File:SotN_Day5Task.png|60px]] Day 5 | |header=[[File:SotN_Day5Task.png|60px]] Day 5 | ||
|content= | |content= | ||
*Refute 20 | *Refute 20 Logic arguments<br />''Use "Intuition" wisely and let it be your shield''<br />{{Item icon|Logic Impression II}} x20 | ||
::Complete [[Legal Studies# | ::Complete [[Legal Studies#Psychology|Psychological Consult]] if needed or see [[#Efficiency Guide|Efficiency Guide]] below | ||
*Use 30 Marius cards in debates<br />''" | *Use 30 Marius cards in debates<br />''"Miss, you can come find me any time."''<br />{{Item icon|Touch Stylus}} x20 | ||
*Debate in Artem's car<br />''You can reap surprises even in familiar places''<br />{{Currency|Stellin}} x15,000 | *Debate in Artem's car<br />''You can reap surprises even in familiar places''<br />{{Currency|Stellin}} x15,000 | ||
::Complete [[Main Story 03-02]] | ::Complete [[Main Story 03-02]] | ||
| Line 71: | Line 78: | ||
|header=[[File:SotN_Day6Task.png|60px]] Day 6 | |header=[[File:SotN_Day6Task.png|60px]] Day 6 | ||
|content= | |content= | ||
*Refute 20 | *Refute 20 Empathy arguments<br />''"Logic" is your most trustworthy weapon''<br />{{Item icon|Empathy Impression II}} x20 | ||
::Complete [[Legal Studies# | ::Complete [[Legal Studies#Crisis|Crisis Intervention]] if needed or see [[#Efficiency Guide|Efficiency Guide]] below | ||
*Use 30 Marius cards in debates<br />''" | *Use 30 Marius cards in debates<br />''"Miss, you can come find me any time."''<br />{{Item icon|Bluetooth Earpiece}} x20 | ||
*Debate with Male Journalist<br />''If you often encounter a stranger, why not learn more about them?''<br />{{Item icon|Oracle of Justice IV}} x10 | *Debate with Male Journalist<br />''If you often encounter a stranger, why not learn more about them?''<br />{{Item icon|Oracle of Justice IV}} x10 | ||
::Complete [[Crisis Intervention III]], [[Analytical Reasoning III]], or [[Psychological Consult III]] | ::Complete [[Crisis Intervention III]], [[Analytical Reasoning III]], or [[Psychological Consult III]] | ||
| Line 83: | Line 90: | ||
|header=[[File:SotN_Day7Task.png|60px]] Day 7 | |header=[[File:SotN_Day7Task.png|60px]] Day 7 | ||
|content= | |content= | ||
*Refute 20 | *Refute 20 Intuition arguments<br />''"Empathy" is an essential ability''<br />{{Item icon|Intuition Impression II}} x20 | ||
::Complete [[Legal Studies# | ::Complete [[Legal Studies#Analysis|Analytical Reasoning]] if needed or see [[#Efficiency Guide|Efficiency Guide]] below | ||
*Use 30 Vyn cards in debates<br />''"It is my honor to assist you."'' | *Use 30 Vyn cards in debates<br />''"It is my honor to assist you."''<br />{{Item icon|Pocket Watch}} x20 | ||
*Debate with Janus<br />''Pay an occasional visit to an "old acquaintance"''<br />{{Item icon|Oracle of Justice IV}} x10 | *Debate with Janus<br />''Pay an occasional visit to an "old acquaintance"''<br />{{Item icon|Oracle of Justice IV}} x10 | ||
::Complete [[Main Story 02-27]] or [[Anomaly Level 02-16]] | ::Complete [[Main Story 02-27]] or [[Anomaly Level 02-16]] | ||
| Line 107: | Line 114: | ||
|header=[[File:SotN_Day9Task.png|60px]] Day 9 | |header=[[File:SotN_Day9Task.png|60px]] Day 9 | ||
|content= | |content= | ||
*Refute 20 Intuition arguments<br />''" | *Refute 20 Intuition arguments<br />''"Logic" is an essential ability''<br />{{Item icon|Intuition Impression II}} x20 | ||
::Complete [[Legal Studies#Analysis|Analytical Reasoning]] if needed or see [[#Efficiency Guide|Efficiency Guide]] below | ::Complete [[Legal Studies#Analysis|Analytical Reasoning]] if needed or see [[#Efficiency Guide|Efficiency Guide]] below | ||
* Use 30 Artem cards in debates<br />''"I am with you."''<br />{{Item icon|Sapphire Cufflinks}} x20 | * Use 30 Artem cards in debates<br />''"I am with you."''<br />{{Item icon|Sapphire Cufflinks}} x20 | ||
| Line 134: | Line 141: | ||
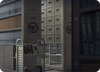
===[[File:SotN_Location1_Icon.png|100px|text-bottom|link=]] Big Data Lab=== | ===[[File:SotN_Location1_Icon.png|100px|text-bottom|link=]] Big Data Lab=== | ||
The Big Data Lab is unlocked to visit upon completion of one task from the Vesper Box. | The Big Data Lab is unlocked to visit upon completion of one task from the Vesper Box. ''See also: [[Symphony of the Night Event/Scripts#Big Data Lab: Location Unlocked|Unlock Dialogue]]'' | ||
====Clues==== | ====Clues==== | ||
{ | {| class="wikitable" | ||
| | !colspan="2"|Clue||Options | ||
|- | |||
| | |[[File:SotN_Loc1_Clue1.png|80px]] | ||
| | |style="text-align:center;"|Clue 1: Cybercrime group<br />''See also: [[Symphony of the Night Event/Scripts#Big Data Lab Clue #1: Cybercrime group|Dialogue]]'' | ||
|'''Cybercrime group''' (3 tasks)<br />The Big Data Lab has some information regarding the cybercrime group "Notro." | |||
|- | |||
|rowspan="2"|[[File:SotN_Loc1_Clue2.png|80px]] | |||
|rowspan="2" style="text-align:center;"|Clue 2: A cooperative relationship?<br />''See also: [[Symphony of the Night Event/Scripts#Big Data Lab Clue #2: A cooperative relationship?|Dialogue]]'' | |||
| | |'''Enemy''' (4 tasks)<br />According to physical records from the Big Data Lab, the hacker Medilla became Notro's enemy because of a certain conflict. | ||
| | |- | ||
| | |'''Ally''' (5 tasks)<br />According to physical records from the Big Data Lab, a hacker named Medilla frequented Notro as an ally and one of its high-level members. | ||
| | |- | ||
|rowspan="2"|[[File:SotN_Loc1_Clue3.png|80px]] | |||
|rowspan="2" style="text-align:center;"|Clue 3: The timing of the deal<br />''See also: [[Symphony of the Night Event/Scripts#Big Data Lab Clue #3: The timing of the deal|Dialogue]]'' | |||
|'''After Notro's short outage''' (22 tasks)<br />Big Data Lab records show that the agreement between Medilla and Pax Technology is still in effect, even after Notro went dormant. | |||
|- | |||
|'''Before Notro's short outage''' (23 tasks)<br />Big Data Lab records show that an agreement between Medilla and Pax Technology was reached before Notro went dormant. | |||
|- | |||
|rowspan="2"|[[File:SotN_Loc1_Clue4.png|80px]] | |||
|rowspan="2" style="text-align:center;"|Clue 4: Reparation for members after the incident<br />''See also: [[Symphony of the Night Event/Scripts#Big Data Lab Clue #4: Reparation for members after the incident|Dialogue]]'' | |||
|'''Revival manifesto''' (31 tasks)<br />There is a copy of the Notro manifesto in the Big Data Lab database. Perhaps they think they will make a comeback. | |||
|- | |||
|'''Death threat''' (32 tasks)<br />Rather than an apology or a promise, the Notro manifesto feels more like a death threat to those that would stand against Notro. | |||
|} | |||
| | |||
| | |||
| | |||
| | |||
| | |||
| | |||
| | |||
| | |||
| | |||
| | |||
| | |||
| | |||
| | |||
| | |||
} | |||
====Correct Answers==== | |||
{{ | {{Spoiler|text=Clue 2: Enemy<br />Clue 3: Before Notro's short outage<br />Clue 4: Death threat}} | ||
}} | |||
===[[File:SotN_Location2_Icon.png|100px|text-bottom|link=]] Abandoned Server Room=== | ===[[File:SotN_Location2_Icon.png|100px|text-bottom|link=]] Abandoned Server Room=== | ||
The Abandoned Server Room is unlocked to visit upon completion of two tasks from the Vesper Box. | The Abandoned Server Room is unlocked to visit upon completion of two tasks from the Vesper Box. ''See also: [[Symphony of the Night Event/Scripts#Abandoned Server Room: Location Unlocked|Unlock Dialogue]]'' | ||
====Clues==== | ====Clues==== | ||
{ | {| class="wikitable" | ||
| | !colspan="2"|Clue||Options | ||
|- | |||
| | |rowspan="2"|[[File:SotN_Loc2_Clue1.png|80px]] | ||
| | |rowspan="2" style="text-align:center;"|Clue 1: The tool's purpose?<br />''See also: [[Symphony of the Night Event/Scripts#Abandoned Server Room Clue #1: The tool's purpose?|Dialogue]]'' | ||
|'''Virus''' (7 tasks)<br />Recorded in a notebook found in a server room drawer, Notro had attempted to develop a large-scale virus that would cause network outages for criminal purposes. | |||
|- | |||
|'''Information theft tool''' (8 tasks)<br />In a certain drawer in the server room, a notebook recorded the entire development process for a virus' code meant to steal information. | |||
|- | |||
| | |rowspan="2"|[[File:SotN_Loc2_Clue2.png|80px]] | ||
| | |rowspan="2" style="text-align:center;"|Clue 2: The node in the center?<br />''See also: [[Symphony of the Night Event/Scripts#Abandoned Server Room Clue #2: The node in the center?|Dialogue]]'' | ||
|'''Core station''' (10 tasks)<br />On the notice board in the server room, one network node is highlighted: Notro's core station. It is likely the safest place for their valued tool. | |||
|- | |||
|'''Hidden node''' (11 tasks)<br />On the notice board, Medilla recorded the node where Notro hid their criminal tool. | |||
|- | |||
|rowspan="2"|[[File:SotN_Loc2_Clue3.png|80px]] | |||
|rowspan="2" style="text-align:center;"|Clue 3: Could it be that she is...<br />''See also: [[Symphony of the Night Event/Scripts#Abandoned Server Room Clue #3: Could it be that she is...|Dialogue]]'' | |||
|'''Missing person''' (29 tasks)<br />All these gifts were hidden away on a laptop in the old generator room, waiting for someone to find them. | |||
|- | |||
|'''Client''' (30 tasks)<br />The real "client" is sending out a distress signal from the laptop. | |||
|- | |||
| | |[[File:SotN_Loc2_Clue4.png|80px]] | ||
| | |style="text-align:center;"|Clue 4: Special method of communication?<br />''See also: [[Symphony of the Night Event/Scripts#Abandoned Server Room Clue #4: Special method of communication?|Dialogue]]'' | ||
| | |'''Real contract''' (36 tasks)<br />The real contract will only unlock if the Vesper Box is brought there. | ||
| | |} | ||
| | |||
| | |||
| | |||
| | |||
| | |||
| | |||
| | |||
| | |||
| | |||
| | |||
| | |||
| | |||
| | |||
====Correct Answers==== | |||
{{Spoiler|text=Clue 1: Information theft tool<br />Clue 2: Core station<br />Clue 3: Client}} | |||
{{ | |||
}} | |||
===[[File:SotN_Location3_Icon.png|100px|text-bottom|link=]] Abyss=== | ===[[File:SotN_Location3_Icon.png|100px|text-bottom|link=]] The Abyss=== | ||
Abyss is unlocked to visit upon completion of six tasks from the Vesper Box. | The Abyss is unlocked to visit upon completion of six tasks from the Vesper Box. ''See also: [[Symphony of the Night Event/Scripts#The Abyss: Location Unlocked|Unlock Dialogue]]'' | ||
====Clues==== | ====Clues==== | ||
{ | {| class="wikitable" | ||
| | !colspan="2"|Clue||Options | ||
|- | |||
| | |rowspan="2"|[[File:SotN_Loc3_Clue1.png|80px]] | ||
|rowspan="2" style="text-align:center;"|Clue 1: Other meanings?<br />''See also: [[Symphony of the Night Event/Scripts#The Abyss Clue #1: Other meanings?|Dialogue]]'' | |||
|'''Writing''' (24 tasks)<br />On the bar counter at "The Abyss," the killer left a message that was like code to them. | |||
|- | |||
|'''Cipher''' (25 tasks)<br />On the bar counter at "The Abyss," these symbols hinted at course of action. | |||
|- | |||
| | |rowspan="2"|[[File:SotN_Loc3_Clue2.png|80px]] | ||
| | |rowspan="2" style="text-align:center;"|Clue 2: The painting on the right wall<br />''See also: [[Symphony of the Night Event/Scripts#The Abyss Clue #2: The painting on the right wall|Dialogue]]'' | ||
|'''Continue tracking''' (26 tasks)<br />The killer left a command at "The Abyss." The search continues! | |||
|- | |||
|'''Stop tracking''' (27 tasks)<br />The signal transmitting from the hanging painting in The Abyss says the tracking won't stop until the target is dead. | |||
|- | |||
|[[File:SotN_Loc3_Clue3.png|80px]] | |||
|style="text-align:center;"|Clue 3: Assassination<br />''See also: [[Symphony of the Night Event/Scripts#The Abyss Clue #3: Assassination|Dialogue]]'' | |||
|{{Spoiler|text='''Successful assassination''' (35 tasks)<br />The killer left a message in the chilled wine barrel. One can tell its meaning with a glance of its easy symbols.}} | |||
|} | |||
| | |||
| | |||
| | |||
| | |||
| | |||
| | |||
| | |||
{{Spoiler|text=The killer left a message in the chilled wine barrel. One can tell its meaning with a glance of its easy symbols.}} | |||
| | |||
==== | ====Correct Answers==== | ||
{{ | {{Spoiler|text=Clue 1: Cipher<br />Clue 2: Continue tracking}} | ||
}} | |||
===[[File:SotN_Location4_Icon.png|100px|text-bottom|link=]] Old Street in North Stellis=== | ===[[File:SotN_Location4_Icon.png|100px|text-bottom|link=]] Old Street in North Stellis=== | ||
Old Street in North Stellis is unlocked to visit upon completion of nine tasks from the Vesper Box. | Old Street in North Stellis is unlocked to visit upon completion of nine tasks from the Vesper Box. ''See also: [[Symphony of the Night Event/Scripts#Old Street in North Stellis: Location Unlocked|Unlock Dialogue]]'' | ||
====Clues==== | ====Clues==== | ||
{ | {| class="wikitable" | ||
| | !colspan="2"|Clue||Options | ||
|- | |||
| | |[[File:SotN_Loc4_Clue1.png|80px]] | ||
| | |style="text-align:center;"|Clue 1: When he went missing...<br />''See also: [[Symphony of the Night Event/Scripts#Old Street in North Stellis Clue #1: When he went missing...|Dialogue]]'' | ||
|'''Gone for a month''' (12 tasks)<br />On the neighborhood gate in North Stellis' Old Street, an electricity meter's records clearly indicate the number of interrupted meters, starting from the beginning of the previous month. | |||
|- | |||
|rowspan="2"|[[File:SotN_Loc4_Clue2.png|80px]] | |||
|rowspan="2" style="text-align:center;"|Clue 2: Why he lived this way<br />''See also: [[Symphony of the Night Event/Scripts#Old Street in North Stellis Clue #2: Why he lived this way|Dialogue]]'' | |||
| | |'''Hidden whereabouts''' (16 tasks)<br />In the old street in North Stellis, there is a house with the number 202 that is closed all the year round. It is speculated that the tenant may have a secret identity that needs to be kept hidden. | ||
| | |- | ||
| | |'''Restricted movement''' (17 tasks)<br />In the old street in North Stellis, there is a house with the number 202 that is closed all the year round. It is speculated that the tenant doesn't appear in public because of physical difficulties. | ||
| | |- | ||
|[[File:SotN_Loc4_Clue3.png|80px]] | |||
|style="text-align:center;"|Clue 3: Medilla was already prepared<br />''See also: [[Symphony of the Night Event/Scripts#Old Street in North Stellis Clue #3: Medilla was already prepared|Dialogue]]'' | |||
|'''Long-term Stay''' (21 tasks)<br />The community of the old street in North Stellis opened a small flea market to sell all the belongings of the person who planned to coop themselves in the house with the number 202 for a long time. | |||
|} | |||
| | |||
| | |||
| | |||
| | |||
| | |||
| | |||
| | |||
==== | ====Correct Answers==== | ||
{{ | {{Spoiler|text=Clue 2: Hidden whereabouts}} | ||
}} | |||
===[[File:SotN_Location5_Icon.png|100px|text-bottom|link=]] School Archives Room=== | ===[[File:SotN_Location5_Icon.png|100px|text-bottom|link=]] School Archives Room=== | ||
School Archives Room is | School Archives Room is unlocked to visit upon completion of 13 tasks from the Vesper Box.''See also: [[Symphony of the Night Event/Scripts#School Archives Room: Location Unlocked|Unlock Dialogue]]'' | ||
====Clues==== | ====Clues==== | ||
{ | {| class="wikitable" | ||
| | !colspan="2"|Clue||Options | ||
|- | |||
| | |rowspan="2"|[[File:SotN_Loc5_Clue1.png|80px]] | ||
| | |rowspan="2" style="text-align:center;"|Clue 1: Pathological desire to escape reality<br />''See also: [[Symphony of the Night Event/Scripts#School Archives Room Clue #1: Pathological desire to escape reality|Dialogue]]'' | ||
|'''Psychiatric patient''' (14 tasks)<br />The top shelf in the school archives room houses a collection of class photos. Among these, there is a photo of a boy whom few remember due to his anti-social nature. | |||
|- | |||
|'''Escaping reality''' (15 tasks)<br />On the top shelf of the school's archives is a collection of class photos. There was a boy that was admitted to the hospital for mental illness. In the end, the photographer edited him into the group photo. | |||
|- | |||
| | |rowspan="2"|[[File:SotN_Loc5_Clue2.png|80px]] | ||
| | |rowspan="2" style="text-align:center;"|Clue 2: The rumored school relationship<br />''See also: [[Symphony of the Night Event/Scripts#School Archives Room Clue #2: The rumored school relationship|Dialogue]]'' | ||
|'''Guise''' (18 tasks)<br />On the second shelf of the school's archives room is a collection of personal anecdotes written by the administrator. There was a rumor that the prettiest girl in school was a famous hacker. | |||
|- | |||
|'''Couple''' (19 tasks)<br />On the second shelf of the school's archives room is a collection of personal anecdotes written by the administrator. There was a rumor that the prettiest girl was involved with a famous hacker. | |||
|- | |||
|[[File:SotN_Loc5_Clue3.png|80px]] | |||
|style="text-align:center;"|Clue 3: They are already...<br />''See also: [[Symphony of the Night Event/Scripts#School Archives Room Clue #3: They are already...|Dialogue]]'' | |||
|'''Breakup''' (20 tasks)<br />On the lower shelf of the school's archives room is a collection of clues about him left behind by his lover after they broke up. | |||
|} | |||
| | |||
| | |||
| | |||
| | |||
| | |||
====Correct Answers==== | |||
{{Spoiler|text=Clue 1: Mental health patient<br />Clue 2: Couple}} | |||
{{Spoiler|text= | |||
}} | |||
===[[File:SotN_Location6_Icon.png|100px|text-bottom|link=]] Stellis Harbor=== | ===[[File:SotN_Location6_Icon.png|100px|text-bottom|link=]] Stellis Harbor=== | ||
Stellis Harbor is | Stellis Harbor is unlocked to visit upon completion of 28 tasks from the Vesper Box. ''See also: [[Symphony of the Night Event/Scripts#Stellis Harbor: Location Unlocked|Unlock Dialogue]]'' | ||
====Clues==== | ====Clues==== | ||
{| class="wikitable" | |||
| | !colspan="2"|Clue||Options | ||
|- | |||
|rowspan="2"|[[File:SotN_Loc6_Clue1.png|80px]] | |||
|rowspan="2" style="text-align:center;"|Clue 1: How Medilla left<br />''See also: [[Symphony of the Night Event/Scripts#Stellis Harbor Clue #1: How Medilla left|Dialogue]]'' | |||
|'''Forged email''' (34 tasks)<br />On a laptop in a warehouse of the Stellis Harbor, there was an email from someone that wasn't an employee. | |||
|- | |||
| | |'''Infiltration''' (33 tasks)<br />On a laptop in a warehouse of the Stellis Harbor, there was an email that recorded his attempted infiltration. This may be his last footprint in Stellis. | ||
| | |} | ||
====Correct Answers==== | |||
{{Spoiler|text=Clue 1: Forged email}} | |||
{{ | |||
== | ==Event Scripts== | ||
Due to the complex order of the plot, scripts have been moved to a subpage; please see [[Symphony of the Night Event/Scripts]]. | |||
==Rewards and Campaigns== | ==Rewards and Campaigns== | ||
===Truth Rewards=== | |||
* Truth I: {{Currency|S-Chip}} x100 | |||
* Truth II: {{Currency|S-Chip}} x100 | |||
* Truth III: {{Currency|S-Chip}} x100 | |||
* Truth IV: {{Currency|S-Chip}} x100, {{Item icon|Selection Star SR}} x1 | |||
* Truth V: {{Currency|S-Chip}} x100, {{Item icon|Selection Star SR}} x1 | |||
* Truth VI: {{Currency|S-Chip}} x100, {{Item icon|Selection Star SR}} x1 | |||
* Truth VII: {{Currency|S-Chip}} x200, {{Item icon|Selection Star SR}} x1, [[File:Witch's Gift Badge.png|30px|link=]] [[Badges|Witch's Gift Badge]] x1 | |||
===Mall Event Items=== | ===Mall Event Items=== | ||
====Event Packs==== | ====Event Packs==== | ||
{| | {{Mall pack table | ||
|packs= | |||
| | {{Mall pack | ||
|name=Midnight Vision Pack I | |||
| | |item1={{Currency|Tears of Themis}} x1 | ||
|item2={{Item icon|Energy Drink Family Pack}} x1 | |||
|item3={{Item icon|Oracle of Justice III}} x10 | |||
|price=$0.99 | |||
|$0.99 | |limit=1/week | ||
|1/week | }} | ||
{{Mall pack | |||
|name=Midnight Vision Pack II | |||
| | |item1={{Currency|Tears of Themis}} x5 | ||
|item2={{Currency|Stellin}} x20,000 | |||
|item3={{Item icon|Oracle of Justice III}} x20 | |||
|price=$5.99 | |||
|$5.99 | |limit=1/week | ||
|1/week | }} | ||
{{Mall pack | |||
|name=Midnight Vision Pack III | |||
| | |item1={{Currency|Tears of Themis}} x10 | ||
|item2={{Item icon|Mind Chip III}} x15 | |||
|item3={{Item icon|Infinity Chip III}} x15 | |||
|price=$11.99 | |||
|$11.99 | |limit=1/account | ||
|1/account | }}}} | ||
====Time-Limited Packs==== | ====Time-Limited Packs==== | ||
{| | {{Mall pack table | ||
|packs= | |||
| | {{Mall pack | ||
|name=Infinity Material Pack | |||
| | |item1={{Item icon|Infinity Chip II}} x5 | ||
|item2={{Item icon|Infinity Chip III}} x5 | |||
|item3={{Item icon|Oil-Painting Tools}} x6 | |||
|item4={{Item icon|Block Component}} x6 | |||
|item5={{Item icon|Touch Stylus}} x6 | |||
|item6={{Item icon|Bluetooth Earpiece}} x6 | |||
|item7={{Item icon|Stud Earring}} x6 | |||
|item8={{Item icon|Pass Key}} x6 | |||
|item9={{Currency|Stellin}} x50,000 | |||
|price={{Currency|Gem}} x9 | |||
|{{Currency|Gem}} x9 | |limit=4/account | ||
|4/account | }} | ||
{{Mall pack | |||
|name=Mind Material Pack | |||
| | |item1={{Item icon|Mind Chip II}} x5 | ||
|item2={{Item icon|Mind Chip III}} x5 | |||
|item3={{Item icon|Vinyl Record}} x6 | |||
|item4={{Item icon|Wooden Gardening Spade}} x6 | |||
|item5={{Item icon|Voice Recorder}} x6 | |||
|item6={{Item icon|Pocket Watch}} x6 | |||
|item7={{Item icon|Gilded Poker Cards}} x6 | |||
|item8={{Item icon|Ceramic Tea Cup}} x6 | |||
|item9={{Currency|Stellin}} x50,000 | |||
|price={{Currency|Gem}} x9 | |||
|{{Currency|Gem}} x9 | |limit=4/account | ||
|4/account | }}}} | ||
====Privilege Pack==== | ====Privilege Pack==== | ||
{| | {{Mall pack table | ||
|packs= | |||
{{Mall pack | |||
|name=Midnight Privilege Pack | |||
|{{Currency|Tears of Themis}} x3 | |item1={{Currency|Tears of Themis}} x3 | ||
|{{Currency|Gem}} x15 | |price={{Currency|Gem}} x15 | ||
|1/account | |limit=1/account | ||
|} | }}}} | ||
{{Event navbox}} | |||
{{#seo: | |||
|title={{PAGENAME}} - Tears of Themis Wiki | |||
|keywords=tears of themis symphony of the night,tears of themis symphony of the night event,symphony of the night event,tears of themis symphony of the night tasks,tears of themis symphony of the night event tasks,tears of themis symphony of the night answers,tears of themis symphony of the night event answers,tears of themis symphony of the night guide,tears of themis symphony of the night event guide,tears of themis symphony of the night story,tears of themis symphony of the night event story | |||
|description=Information detailing the Symphony of the Night Event in Tears of Themis. | |||
}} | |||
[[Category:Events]] | |||
Latest revision as of 01:11, 20 February 2023

| Symphony of the Night | |
|---|---|
| Start Date | 2021-10-20 11:00 UTC +9 |
| End Date | 2021-11-03 04:00 UTC +9 |
| Duration | Approx. 14 days |
At midnight, a splendid symphony has already begun.
Accept this contract and set the stage for a journey through mysterious urban legends...
Players' main task in this event is to unlock the secrets of the Vesper Box, which contains hints and clues in the form of daily tasks. After completing tasks, players will unlock locations to visit and investigate for clues.
Tasks[edit | edit source]
 Day 1
Day 1
- Log in daily
Discover the secrets of the Vesper Box Stellin x10,000
 - Refute 20 Logic arguments
Use "Intuition" wisely and let it be your shield Logic Impression II x20
- Complete Psychological Consult if needed or see Efficiency Guide below
- Debate with Kiki
"Interact" with close friends now and then Oracle of Justice IV x10
- Complete Operational Assessment II
- Debate at Themis Law Firm reception
You can reap surprises even in familiar placesStellin x15,000
- Complete Main Story 01-02
 Day 2
Day 2
- Refute 20 Intuition arguments
"Empathy" is an essential ability Intuition Impression II x20
- Complete Analytical Reasoning if needed or see Efficiency Guide below
- Use 30 Artem cards in debates
"I am with you." Tie Clip x20
 - Debate with Courier
If you often encounter a stranger, why not learn more about them?Oracle of Justice IV x10
- Complete Business Consult II
- Debate at Penny's Comfort Foods
Some places always bring about new acquaintancesStellin x15,000
- Complete Main Story 01-08
 Day 3
Day 3
- Refute 20 Empathy arguments
"Logic" is your most trustworthy weapon Empathy Impression II x20
- Complete Crisis Intervention if needed or see Efficiency Guide below
- Use 30 Luke cards in debates
"I'll always protect you, Watson!" Multipurpose Military Knife x20
 - Debate with Bartender
If you often encounter a stranger, why not learn more about them?Oracle of Justice IV x10
- Debate at Themis Law Firm office
You can reap surprises even in familiar placesStellin x15,000
 Day 4
Day 4
- Refute 20 Empathy arguments
"Logic" is your most trustworthy weaponEmpathy Impression II x20
- Complete Crisis Intervention if needed or see Efficiency Guide below
- Use 30 Vyn cards in debates
"It is my honor to assist you." Voice Recorder x20
 - Debate with Pedro
Pay an occasional visit to an "old acquaintance"Oracle of Justice IV x10
- Complete Main Story 01-02, Main Story 01-16, or Anomaly Level 01-16
- Debate outside Stellis Exhibition Hall
Some places always bring about new acquaintancesStellin x15,000
- Complete Main Story 02-05 or Main Story 02-07
 Day 5
Day 5
- Refute 20 Logic arguments
Use "Intuition" wisely and let it be your shieldLogic Impression II x20
- Complete Psychological Consult if needed or see Efficiency Guide below
- Use 30 Marius cards in debates
"Miss, you can come find me any time." Touch Stylus x20
 - Debate in Artem's car
You can reap surprises even in familiar placesStellin x15,000
- Complete Main Story 03-02
- Debate at Manning Palace Hotel
Some places always bring about new acquaintancesStellin x15,000
 Day 6
Day 6
- Refute 20 Empathy arguments
"Logic" is your most trustworthy weaponEmpathy Impression II x20
- Complete Crisis Intervention if needed or see Efficiency Guide below
- Use 30 Marius cards in debates
"Miss, you can come find me any time." Bluetooth Earpiece x20
 - Debate with Male Journalist
If you often encounter a stranger, why not learn more about them?Oracle of Justice IV x10
- Debate at Gordon Grant's home
Some places always bring about new acquaintancesStellin x15,000
- Complete Main Story 03-04, Main Story 03-06, Main Story 03-08, or Main Story 03-12
 Day 7
Day 7
- Refute 20 Intuition arguments
"Empathy" is an essential abilityIntuition Impression II x20
- Complete Analytical Reasoning if needed or see Efficiency Guide below
- Use 30 Vyn cards in debates
"It is my honor to assist you." Pocket Watch x20
 - Debate with Janus
Pay an occasional visit to an "old acquaintance"Oracle of Justice IV x10
- Complete Main Story 02-27 or Anomaly Level 02-16
- Debate at the harbor warehouse area
Some places always bring about new acquaintancesStellin x15,000
 Day 8
Day 8
- Refute 20 Logic arguments
Use "Intuition" wisely and let it be your shieldLogic Impression II x20
- Complete Psychological Consult if needed or see Efficiency Guide below
- Use 30 Luke cards in debates
"I'll always protect you, Watson!" Pill Organizer x20
 - Debate with Joanne
Pay an occasional visit to an "old acquaintance"Oracle of Justice IV x10
- Complete Main Story 03-15 or Anomaly Level 03-14
- Debate at Luke's home
You can reap surprises even in familiar placesStellin x15,000
 Day 9
Day 9
- Refute 20 Intuition arguments
"Logic" is an essential abilityIntuition Impression II x20
- Complete Analytical Reasoning if needed or see Efficiency Guide below
- Use 30 Artem cards in debates
"I am with you." Sapphire Cufflinks x20
 - Debate with Celestine
"Interact" with close friends now and thenOracle of Justice IV x10
- Complete Operational Assessment IV or Operational Assessment V
- Debate at NXX Headquarters
You can reap surprises even in familiar placesStellin x15,000
- Complete Main Story 05-02, Anomaly Level 05-01, or Anomaly Level 05-07
Efficiency Guide[edit | edit source]
For tasks that require the player to refute specific numbers of certain types of argument, the most AP-efficient stages to complete the tasks are as follows:
- Intuition stages
- 4 arguments per 10 AP - Luke's Story 01-08, Luke's Story 02-12, Artem's Story 02-12, Vyn's Story 01-10, Marius' Story 02-12
- Or, if the player wishes for more lucrative drops, Anomaly Level 03-14 has 5 arguments for 15 AP.
- Empathy stages
- 4 arguments per 10 AP - Artem's Story 01-11, Vyn's Story 02-12, Marius' Story 01-11
- Or, if the player wishes for more lucrative drops, Anomaly Level 05-36 has 4 arguments for 15 AP.
- Logic stages
- 5 arguments per 10 AP - Main Story 05-12
- Or, if the player wishes for more lucrative drops, Anomaly Level 01-16 has 5 arguments for 15 AP.
Investigation[edit | edit source]
As the player completes tasks, clues and locations open up for investigation, as well as new stages in the group chat feature.
 Big Data Lab[edit | edit source]
The Big Data Lab is unlocked to visit upon completion of one task from the Vesper Box. See also: Unlock Dialogue
Clues[edit | edit source]
| Clue | Options | |
|---|---|---|

|
Clue 1: Cybercrime group See also: Dialogue |
Cybercrime group (3 tasks) The Big Data Lab has some information regarding the cybercrime group "Notro." |

|
Clue 2: A cooperative relationship? See also: Dialogue |
Enemy (4 tasks) According to physical records from the Big Data Lab, the hacker Medilla became Notro's enemy because of a certain conflict. |
| Ally (5 tasks) According to physical records from the Big Data Lab, a hacker named Medilla frequented Notro as an ally and one of its high-level members. | ||

|
Clue 3: The timing of the deal See also: Dialogue |
After Notro's short outage (22 tasks) Big Data Lab records show that the agreement between Medilla and Pax Technology is still in effect, even after Notro went dormant. |
| Before Notro's short outage (23 tasks) Big Data Lab records show that an agreement between Medilla and Pax Technology was reached before Notro went dormant. | ||

|
Clue 4: Reparation for members after the incident See also: Dialogue |
Revival manifesto (31 tasks) There is a copy of the Notro manifesto in the Big Data Lab database. Perhaps they think they will make a comeback. |
| Death threat (32 tasks) Rather than an apology or a promise, the Notro manifesto feels more like a death threat to those that would stand against Notro. | ||
Correct Answers[edit | edit source]
Clue 3: Before Notro's short outage
Clue 4: Death threat
 Abandoned Server Room[edit | edit source]
The Abandoned Server Room is unlocked to visit upon completion of two tasks from the Vesper Box. See also: Unlock Dialogue
Clues[edit | edit source]
| Clue | Options | |
|---|---|---|

|
Clue 1: The tool's purpose? See also: Dialogue |
Virus (7 tasks) Recorded in a notebook found in a server room drawer, Notro had attempted to develop a large-scale virus that would cause network outages for criminal purposes. |
| Information theft tool (8 tasks) In a certain drawer in the server room, a notebook recorded the entire development process for a virus' code meant to steal information. | ||

|
Clue 2: The node in the center? See also: Dialogue |
Core station (10 tasks) On the notice board in the server room, one network node is highlighted: Notro's core station. It is likely the safest place for their valued tool. |
| Hidden node (11 tasks) On the notice board, Medilla recorded the node where Notro hid their criminal tool. | ||

|
Clue 3: Could it be that she is... See also: Dialogue |
Missing person (29 tasks) All these gifts were hidden away on a laptop in the old generator room, waiting for someone to find them. |
| Client (30 tasks) The real "client" is sending out a distress signal from the laptop. | ||

|
Clue 4: Special method of communication? See also: Dialogue |
Real contract (36 tasks) The real contract will only unlock if the Vesper Box is brought there. |
Correct Answers[edit | edit source]
Clue 2: Core station
Clue 3: Client
 The Abyss[edit | edit source]
The Abyss is unlocked to visit upon completion of six tasks from the Vesper Box. See also: Unlock Dialogue
Clues[edit | edit source]
| Clue | Options | |
|---|---|---|

|
Clue 1: Other meanings? See also: Dialogue |
Writing (24 tasks) On the bar counter at "The Abyss," the killer left a message that was like code to them. |
| Cipher (25 tasks) On the bar counter at "The Abyss," these symbols hinted at course of action. | ||

|
Clue 2: The painting on the right wall See also: Dialogue |
Continue tracking (26 tasks) The killer left a command at "The Abyss." The search continues! |
| Stop tracking (27 tasks) The signal transmitting from the hanging painting in The Abyss says the tracking won't stop until the target is dead. | ||

|
Clue 3: Assassination See also: Dialogue |
Successful assassination (35 tasks)
The killer left a message in the chilled wine barrel. One can tell its meaning with a glance of its easy symbols. |
Correct Answers[edit | edit source]
Clue 2: Continue tracking
 Old Street in North Stellis[edit | edit source]
Old Street in North Stellis is unlocked to visit upon completion of nine tasks from the Vesper Box. See also: Unlock Dialogue
Clues[edit | edit source]
| Clue | Options | |
|---|---|---|

|
Clue 1: When he went missing... See also: Dialogue |
Gone for a month (12 tasks) On the neighborhood gate in North Stellis' Old Street, an electricity meter's records clearly indicate the number of interrupted meters, starting from the beginning of the previous month. |

|
Clue 2: Why he lived this way See also: Dialogue |
Hidden whereabouts (16 tasks) In the old street in North Stellis, there is a house with the number 202 that is closed all the year round. It is speculated that the tenant may have a secret identity that needs to be kept hidden. |
| Restricted movement (17 tasks) In the old street in North Stellis, there is a house with the number 202 that is closed all the year round. It is speculated that the tenant doesn't appear in public because of physical difficulties. | ||

|
Clue 3: Medilla was already prepared See also: Dialogue |
Long-term Stay (21 tasks) The community of the old street in North Stellis opened a small flea market to sell all the belongings of the person who planned to coop themselves in the house with the number 202 for a long time. |
Correct Answers[edit | edit source]
 School Archives Room[edit | edit source]
School Archives Room is unlocked to visit upon completion of 13 tasks from the Vesper Box.See also: Unlock Dialogue
Clues[edit | edit source]
| Clue | Options | |
|---|---|---|

|
Clue 1: Pathological desire to escape reality See also: Dialogue |
Psychiatric patient (14 tasks) The top shelf in the school archives room houses a collection of class photos. Among these, there is a photo of a boy whom few remember due to his anti-social nature. |
| Escaping reality (15 tasks) On the top shelf of the school's archives is a collection of class photos. There was a boy that was admitted to the hospital for mental illness. In the end, the photographer edited him into the group photo. | ||

|
Clue 2: The rumored school relationship See also: Dialogue |
Guise (18 tasks) On the second shelf of the school's archives room is a collection of personal anecdotes written by the administrator. There was a rumor that the prettiest girl in school was a famous hacker. |
| Couple (19 tasks) On the second shelf of the school's archives room is a collection of personal anecdotes written by the administrator. There was a rumor that the prettiest girl was involved with a famous hacker. | ||

|
Clue 3: They are already... See also: Dialogue |
Breakup (20 tasks) On the lower shelf of the school's archives room is a collection of clues about him left behind by his lover after they broke up. |
Correct Answers[edit | edit source]
Clue 2: Couple
 Stellis Harbor[edit | edit source]
Stellis Harbor is unlocked to visit upon completion of 28 tasks from the Vesper Box. See also: Unlock Dialogue
Clues[edit | edit source]
| Clue | Options | |
|---|---|---|

|
Clue 1: How Medilla left See also: Dialogue |
Forged email (34 tasks) On a laptop in a warehouse of the Stellis Harbor, there was an email from someone that wasn't an employee. |
| Infiltration (33 tasks) On a laptop in a warehouse of the Stellis Harbor, there was an email that recorded his attempted infiltration. This may be his last footprint in Stellis. | ||
Correct Answers[edit | edit source]
Event Scripts[edit | edit source]
Due to the complex order of the plot, scripts have been moved to a subpage; please see Symphony of the Night Event/Scripts.
Rewards and Campaigns[edit | edit source]
Truth Rewards[edit | edit source]
- Truth I:
 S-Chip x100
 - Truth II: S-Chip x100
- Truth III: S-Chip x100
- Truth IV: S-Chip x100,
 Selection Star SR x1
 - Truth V: S-Chip x100, Selection Star SR x1
- Truth VI: S-Chip x100, Selection Star SR x1
- Truth VII: S-Chip x200, Selection Star SR x1,
 Witch's Gift Badge x1
Mall Event Items[edit | edit source]
Event Packs[edit | edit source]
| Pack Name | Contents | Price (USD) | Limit |
|---|---|---|---|
 Midnight Vision Pack I |
|
$0.99 | 1/week |
 Midnight Vision Pack II |
|
$5.99 | 1/week |
 Midnight Vision Pack III |
|
$11.99 | 1/account |
Time-Limited Packs[edit | edit source]
| Pack Name | Contents | Price (USD) | Limit |
|---|---|---|---|
 Infinity Material Pack |
|
4/account | |
 Mind Material Pack |
|
4/account |
Privilege Pack[edit | edit source]
| Pack Name | Contents | Price (USD) | Limit |
|---|---|---|---|
 Midnight Privilege Pack |
|
1/account |