Main Story 02-24: Difference between revisions
From Tears of Themis Wiki
imported>Harmonea (evidence, BG move) |
m (→top: adding illustration show switch) |
||
| (2 intermediate revisions by 2 users not shown) | |||
| Line 8: | Line 8: | ||
|firstClearReward={{Currency|S-Chip|size=28px}} x40 | |firstClearReward={{Currency|S-Chip|size=28px}} x40 | ||
|unlock= | |unlock= | ||
|illustrations=show | |||
|guide= | |guide= | ||
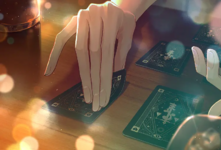
|summary=At the police station, the officers that accompanied [[Vyn Richter|Vyn]] to [[The Abyss]] excitedly recall his performance there, convincing the bartender to hand over his transaction records using a series of card tricks as props for psychological insights. The [[Main Character|main character]] decides to return to [[Themis Law Firm]] to organize the evidence and see what insights [[Artem Wing]] might be able to offer. | |summary=At the police station, the officers that accompanied [[Vyn Richter|Vyn]] to [[The Abyss]] excitedly recall his performance there, convincing the bartender to hand over his transaction records using a series of card tricks as props for psychological insights. The [[Main Character|main character]] decides to return to [[Themis Law Firm]] to organize the evidence and see what insights [[Artem Wing]] might be able to offer. | ||
| Line 18: | Line 19: | ||
}} | }} | ||
|locations= | |locations= | ||
{{Background location|name=Police Station|location=Stellis | {{Background location|name=Police Station|location=Stellis City Police Department|image=Stellis Justice Dept - Waiting Room.png}} | ||
{{Background location|name=Abyss|location=The Abyss|image=The Abyss.png}} | {{Background location|name=Abyss|location=The Abyss|image=The Abyss.png}} | ||
|characters= | |||
{{Character|name=Vyn Richter|image=Vyn character icon 1.png}} | |||
{{Character|name=Darius Morgan|image=Darius Morgan character icon.png}} | |||
{{Character|name=Bar Owner|link=Abyss Proprietor|image=Bartender character icon.png}} | |||
{{Character|name=Police Officer A|image=Passerby M1 character icon.png|nolink=true}} | |||
{{Character|name=Police Officer B|image=Passerby M1 character icon.png|nolink=true}} | |||
}} | }} | ||
Latest revision as of 02:08, 8 May 2024
Overview
- Stage Cost:
 AP x10 (First-Time Cost)
 - First Clear Rewards:
 S-Chip x40
Summary
Illustrations
ClairvoyantDon't even try lying to a psychiatrist.
Location(s)
Stellis City Police Department
Police Station

Police Station
The Abyss
Abyss

Abyss
Character(s)
Evidence
Tetrodotoxin Transaction Info
![]()
Evidence Description (Spoilers)
A detailed police report on the transaction of the Tetrodotoxin, including information on Janus as the buyer, and how it was used.
After Janus purchased the Tetrodotoxin from the Abyss, he injected it into both the bottle of wine and the chocolates.