Mysteries of the Lost Gold: Difference between revisions
imported>Quintessentii (→Mediation Stages: added in column for recommended power too) |
m (Text replacement - "Artem "Here for You"" to "Artem "Here For You"") |
||
| (61 intermediate revisions by 9 users not shown) | |||
| Line 1: | Line 1: | ||
{{Notice DLC}} | |||
{{#vardefine:bannerOverride|Mysteries of the Lost Gold Event banner.png}} | |||
{{#invoke:CargoQuery|main | |||
|q?tables=Event | |||
|q?fields=name=name,startDate=startDate,endDate=endDate,promoImage=promoImage | |||
|q?where=name="Mysteries of the Lost Gold" | |||
|template=Event infobox | |||
|q?limit=1 | |||
}} | |||
''<p>The veil lifts from the mystery of an ancient legend...<br>'' | ''<p>The veil lifts from the mystery of an ancient legend...<br>'' | ||
''Unknown dangers lie on the journey ahead—</p>'' | ''Unknown dangers lie on the journey ahead—</p>'' | ||
| Line 11: | Line 18: | ||
Players during the event explore a hexagonal map to unlock resources and rewards as they follow the characters in Nosta. | Players during the event explore a hexagonal map to unlock resources and rewards as they follow the characters in Nosta. | ||
===Story Stages=== | ===Story/Exploration Stages=== | ||
Nosta's map is a hexagonal grid consisting of several stage types: primarily these are '''Story Stages''' and '''Exploration Stages'''. Each tile costs some amount of supplies to unlock (listed below); tiles which cross "Border Checkpoints" unlock in pairs, and the cost needs only be paid once for the pair (for example, unlocking [[Lost Gold Story 01-07]] also unlocks [[Lost Gold Explore Nosta Forest VII|Explore Nosta Forest VII]] for "free"). | |||
* Story Stages take the player through the event-exclusive storyline; the story is joined in Act I, then splits apart into four paths for Act II and Act III before rejoining for Act IV. In order to view a story tile, the player must have viewed all story stages that precede that chapter; this means that to view the Act IV story, the player must have finished all four routes for Act II and III. | |||
* Exploration Stages put the player onto a grid-based map where the player must complete map tasks such as defeating a Boss, finding Supply chests, and finding the Exit. In the Beach, Forest, and Mountain exploration stages, one Supply Chest per stage will contain {{Item icon|Universal Part}} x1, used for upgrading [[#Facility Control|Facilities]]; all remaining Supply Chests will contain varying amounts of {{Currency|S-Chip}}s (often 10, but up to 100). | |||
====[[File:Mysteries of the Lost Gold Beach icon.png|44px|link=]] Beach==== | ====[[File:Mysteries of the Lost Gold Beach icon.png|44px|link=]] Beach==== | ||
[[File:Lost Gold Beach stage map.png|350px]] | [[File:Lost Gold Beach stage map.png|350px]] | ||
Unlocking all tiles on the beach requires {{Item icon|Emergency Medicine}} x475, {{Item icon|Lumber}} x555, {{Item icon|MRE}} x475, {{Item icon|Drinking Water}} x475. The player begins the event with 500 of each resource, and the remaining lumber is part of the work order tutorial, so it's possible to unlock all Beach stages immediately. | |||
=====Story Stages===== | |||
{{#cargo_query:tables=Stage | |||
|fields=CONCAT('[[', _pageName, '|', name, ']]')=Stage Name,originalUnlock=Unlock Cost | |||
|where=_pageName LIKE "Lost Gold Story 01%" | |||
|format=table | |||
}} | |||
=====Exploration Stages===== | |||
{{#cargo_query:tables=Stage | {{#cargo_query:tables=Stage | ||
|fields=CONCAT('[[', _pageName, '|', name, ']]')=Stage Name, | |fields=CONCAT('[[', _pageName, '|', name, ']]')=Stage Name,originalUnlock=Unlock Cost | ||
|where=_pageName | |where=_pageName LIKE "Lost Gold Explore Nosta Beach%" | ||
|format=table | |format=table | ||
}} | }} | ||
| Line 24: | Line 46: | ||
[[File:Lost Gold Forest stage map.png|675px]] | [[File:Lost Gold Forest stage map.png|675px]] | ||
Unlocking all tiles in the forest requires {{Item icon|Emergency Medicine}} x6,340, {{Item icon|Lumber}} x6,345, {{Item icon|MRE}} x6,015, {{Item icon|Drinking Water}} x6,350. | |||
=====Story Stages===== | |||
{{#cargo_query:tables=Stage | {{#cargo_query:tables=Stage | ||
|fields=CONCAT('[[', _pageName, '|', name, ']]')=Stage Name, | |fields=CONCAT('[[', _pageName, '|', name, ']]')=Stage Name,originalUnlock=Unlock Cost | ||
|where=_pageName LIKE "Lost Gold Luke Investigation 02%" OR | |where=_pageName LIKE "Lost Gold Luke Investigation 02%" OR _pageName LIKE "Lost Gold Artem Investigation 02%" OR _pageName LIKE "Lost Gold Vyn Investigation 02%" OR _pageName LIKE "Lost Gold Marius Investigation 02%" | ||
|format=table | |||
}} | |||
=====Exploration Stages===== | |||
{{#cargo_query:tables=Stage | |||
|fields=CONCAT('[[', _pageName, '|', name, ']]')=Stage Name,originalUnlock=Unlock Cost | |||
|where=_pageName LIKE "Lost Gold Explore Nosta Forest%" | |||
|format=table | |format=table | ||
}} | }} | ||
====[[File:Mysteries of the Lost Gold Mountain icon.png|44px|link=]] Mountain==== | ====[[File:Mysteries of the Lost Gold Mountain icon.png|44px|link=]] Mountain==== | ||
[[File:Lost Gold Mountain stage map.png|675px]] | |||
Unlocking all tiles in the mountain region requires {{Item icon|Emergency Medicine}} x7,420, {{Item icon|Lumber}} x7,320, {{Item icon|MRE}} x7,840, {{Item icon|Drinking Water}} x7,220. | |||
=====Story Stages===== | |||
{{#cargo_query:tables=Stage | |||
|fields=CONCAT('[[', _pageName, '|', name, ']]')=Stage Name,originalUnlock=Unlock Cost | |||
|where=_pageName LIKE "Lost Gold Luke Investigation 03%" OR _pageName LIKE "Lost Gold Artem Investigation 03%" OR _pageName LIKE "Lost Gold Vyn Investigation 03%" OR _pageName LIKE "Lost Gold Marius Investigation 03%" OR _pageName LIKE "Lost Gold Story 04-01" | |||
|format=table | |||
}} | |||
====[[ | =====Exploration Stages===== | ||
{{#cargo_query:tables=Stage | |||
|fields=CONCAT('[[', _pageName, '|', name, ']]')=Stage Name,originalUnlock=Unlock Cost | |||
|where=_pageName LIKE "Lost Gold Explore Nosta Mountain%" | |||
|format=table | |||
}} | |||
=== | ====[[File:Mysteries of the Lost Gold Outer icon.png|44px|link=]] Outer Island==== | ||
[[File:Lost Gold Island stage map.png|350px]] | |||
Unlocking all tiles on the outer island requires {{Item icon|Emergency Medicine}} x6,000, {{Item icon|Lumber}} x6,000, {{Item icon|MRE}} x6,000, {{Item icon|Drinking Water}} x6,000. | |||
=====Story Stages===== | |||
{{#cargo_query:tables=Stage | |||
|fields=CONCAT('[[', _pageName, '|', name, ']]')=Stage Name,originalUnlock=Unlock Cost | |||
|where=_pageName IN ('Lost Gold Story 04-02', 'Lost Gold Story 04-03', 'Lost Gold Story 04-04', 'Lost Gold Story 04-05', 'Lost Gold Story 04-06') | |||
|format=table | |||
}} | |||
{ | =====Exploration Stages===== | ||
{{#cargo_query:tables=Stage | |||
|fields=CONCAT('[[', _pageName, '|', name, ']]')=Stage Name,originalUnlock=Unlock Cost | |||
| [[ | |where=_pageName LIKE "Lost Gold Explore Nosta Outer Island%" | ||
|format=table | |||
}} | |||
| | |||
| | |||
===Mediation Stages=== | ===Mediation Stages=== | ||
| Line 57: | Line 106: | ||
{| class="wikitable" | {| class="wikitable" | ||
! Stage Name || Unlock Cost || Drops || Recommended power | !Stage Name||Unlock Cost||Drops||Recommended power | ||
|- | |- | ||
| [[Lost Gold MED-01|MED-01]] || {{Item icon|Emergency Medicine}} x50, {{Item icon|Lumber}} x50, {{Item icon|MRE}} x50, {{Item icon|Drinking Water}} x50 || {{Currency|Stellin}} | |[[Lost Gold MED-01|MED-01]]||{{Item icon|Emergency Medicine}} x50, {{Item icon|Lumber}} x50, {{Item icon|MRE}} x50, {{Item icon|Drinking Water}} x50||{{Currency|Stellin}} x800, {{Item icon|Hunter's Badge}} x50||6775 | ||
|- | |- | ||
|[[Lost Gold MED-02|MED-02]] || {{Item icon|Emergency Medicine}} x125, {{Item icon|Lumber}} x125, {{Item icon|MRE}} x125, {{Item icon|Drinking Water}} x125 | |[[Lost Gold MED-02|MED-02]]||{{Item icon|Emergency Medicine}} x125, {{Item icon|Lumber}} x125, {{Item icon|MRE}} x125, {{Item icon|Drinking Water}} x125 | ||
|{{Currency|Stellin}} x800, {{Item icon|Hunter's Badge}} x75||20506 | |||
|- | |- | ||
|[[Lost Gold MED-03|MED-03]] || {{Item icon|Emergency Medicine}} x250, {{Item icon|Lumber}} x250, {{Item icon|MRE}} x250, {{Item icon|Drinking Water}} x250|| {{Currency|Stellin}} x800, {{Item icon|Hunter's Badge}} x100 | | [[Lost Gold MED-03|MED-03]]||{{Item icon|Emergency Medicine}} x250, {{Item icon|Lumber}} x250, {{Item icon|MRE}} x250, {{Item icon|Drinking Water}} x250||{{Currency|Stellin}} x800, {{Item icon|Hunter's Badge}} x100||58853 | ||
|- | |- | ||
|[[Lost Gold MED-04|MED-04]] | |[[Lost Gold MED-04|MED-04]]||{{Item icon|Emergency Medicine}} x375, {{Item icon|Lumber}} x375, {{Item icon|MRE}} x375, {{Item icon|Drinking Water}} x375||{{Currency|Stellin}} x800, {{Item icon|Hunter's Badge}} x150||94243 | ||
| | |||
|} | |} | ||
===Urgent Survey Stages=== | ===Urgent Survey Stages=== | ||
Urgent Survey Stages consume {{Item icon|MA7 Locator}} x1 to scan the map to find contestants to debate against. Defeating them rewards a large amount of Hunter's Badge. | Urgent Survey Stages consume {{Item icon|MA7 Locator}} x1 to scan the map to find contestants to debate against. Defeating them rewards a large amount of {{Item icon|Hunter's Badge}} (200 on first clear, 100 after). | ||
* [[Lost Gold Urgent Stage | * [[Lost Gold Urgent Stage (Empathy)|Urgent Stage (Empathy)]] | ||
* [[Lost Gold Urgent Stage (Intuition)|Urgent Stage (Intuition)]] | |||
* [[Lost Gold Urgent Stage (Logic)|Urgent Stage (Logic)]] | |||
==Supply== | ==Supply == | ||
[[File:Lost Gold Supply screen.png|thumb]] | |||
===Facility Control=== | === Facility Control=== | ||
Upon completing the first Exploration stage, the player will gain access to Facility Control, where {{Item icon|Universal Part}} may be exchanged for buffs to influence, defense, and resource gathering throughout the event. | Upon completing the first Exploration stage, the player will gain access to Facility Control, where {{Item icon|Universal Part}} may be exchanged for buffs to influence, defense, and resource gathering throughout the event. | ||
| Line 86: | Line 137: | ||
|- | |- | ||
|0 | |0 | ||
| | |10% | ||
| {{Item icon|Universal Part}} x1 | |{{Item icon|Universal Part}} x1 | ||
|- | |- | ||
|1 | |1 | ||
|10% | |10% | ||
| {{Item icon|Universal Part}} x1 | |{{Item icon|Universal Part}} x1 | ||
|- | |- | ||
|2 | |2 | ||
|20% | |20% | ||
| {{Item icon|Universal Part}} x1 | |{{Item icon|Universal Part}} x1 | ||
|- | |- | ||
|3 | |3 | ||
|30% | |30% | ||
| | |(MAX) | ||
|} | |} | ||
| Line 110: | Line 161: | ||
|0 | |0 | ||
|0% | |0% | ||
| {{Item icon|Universal Part}} x1 | |{{Item icon|Universal Part}} x1 | ||
|- | |- | ||
|1 | |1 | ||
|10% | |10% | ||
| {{Item icon|Universal Part}} x2 | |{{Item icon|Universal Part}} x2 | ||
|- | |- | ||
|2 | |2 | ||
|20% | |20% | ||
| {{Item icon|Universal Part}} x4 | |{{Item icon|Universal Part}} x4 | ||
|- | |- | ||
|3 | |3 | ||
|30% | |30% | ||
| - | |{{Item icon|Universal Part}} x6 | ||
|- | |||
|4 | |||
|40% | |||
|{{Item icon|Universal Part}} x8 | |||
|- | |||
|5 | |||
|50% | |||
|(MAX) | |||
|} | |} | ||
| Line 131: | Line 190: | ||
!Level||Buff amount||Cost to next level | !Level||Buff amount||Cost to next level | ||
|- | |- | ||
| | |0 | ||
0 | |||
|0% | |0% | ||
| {{Item icon|Universal Part}} x1 | |{{Item icon|Universal Part}} x1 | ||
|- | |- | ||
|1 | |1 | ||
|10% | |10% | ||
| {{Item icon|Universal Part}} | |{{Item icon|Universal Part}} x2 | ||
|- | |- | ||
|2 | |2 | ||
|20% | |20% | ||
| {{Item icon|Universal Part}} | |{{Item icon|Universal Part}} x3 | ||
|- | |- | ||
|3 | |3 | ||
|30% | | | ||
| | 30% | ||
|(MAX) | |||
|} | |} | ||
===Work Orders=== | ===Work Orders=== | ||
Work Orders are unlocked after completing Lost Gold 01-06 and generate supplies over time for unlocking additional land area tiles in Mysteries of the Lost Gold. A player can assign each of the four male leads to an item. Each of the male leads has | Work Orders are unlocked after completing Lost Gold 01-06 and generate supplies over time for unlocking additional land area tiles in Mysteries of the Lost Gold. A player can assign each of the four male leads to an item. Unlocking all map tiles requires approximately '''20,000''' of each resource type. Each of the male leads has his own specialty when it comes to gathering supplies. The available supplies, their default guys, and their timings are as follows: | ||
{| class="wikitable" | {| class="wikitable" | ||
| Line 158: | Line 217: | ||
!Marius||Time (hours)||Default Character | !Marius||Time (hours)||Default Character | ||
|- | |- | ||
| {{Item icon|Lumber}} | |{{Item icon|Lumber}} | ||
|60 | |60 | ||
|40 | |40 | ||
|30 | |30 | ||
|50||1||Luke | |50 ||1||Luke | ||
|- | |- | ||
| {{Item icon|Emergency Medicine}} | |{{Item icon|Emergency Medicine}} | ||
|50 | |50 | ||
|30 | |30 | ||
|60 | |60 | ||
|40||1 | |40||1 | ||
| | | | ||
Vyn | Vyn | ||
|- | |- | ||
| {{Item icon|MRE}} | |{{Item icon|MRE}} | ||
|40 | |40 | ||
|60 | |60 | ||
|50 | |50 | ||
|30||1||Artem | |30|| 1||Artem | ||
|- | |- | ||
| {{Item icon|Drinking Water}} | |{{Item icon|Drinking Water}} | ||
|30 | |30 | ||
|50 | |50 | ||
|40 | |40 | ||
|60||1|| | |60||1|| | ||
Marius | Marius | ||
|- | |- | ||
| {{Item icon|MA7 Locator}}*||1 | |{{Item icon|MA7 Locator}}*||1 | ||
|1 | |1 | ||
| Line 191: | Line 251: | ||
|1||24 | |1||24 | ||
| | | | ||
N/A | N/A | ||
|} | |} | ||
<small><nowiki>*</nowiki>MA7 Locator is unlocked after completing all land areas.</small> | <small><nowiki>*</nowiki>MA7 Locator is unlocked after completing all land areas.</small> | ||
After Sept. 14, the Speed Up option for Work | When all 98 areas of Nosta are unlocked, {{Item icon|Lumber}}, {{Item icon|Emergency Medicine}}, {{Item icon|MRE}}, and {{Item icon|Drinking Water}} Work Orders supply selection automatically change to {{Item icon|MA7 Locator}}. A total of three can be held, each requiring 24 hr to find. The previous resources can no longer be selected. After Sept. 14, the Speed Up option for Work Orders will be available. | ||
==Investigation Plan== | ==Investigation Plan== | ||
Badges and other items may be obtained from event tasks as follows: | Badges and other items may be obtained from event tasks as follows: | ||
===Task List === | ===Task List=== | ||
{| class="wikitable mw-collapsible mw-collapsed" | {| class="wikitable mw-collapsible mw-collapsed" | ||
!Quest|| Reward | !Quest||Reward | ||
|- | |- | ||
|Complete 1 Exploration Levels and reach 100% Exploration Progress | |Complete 1 Exploration Levels and reach 100% Exploration Progress | ||
|{{Item icon|Hunter's Badge}} x50 | |{{Item icon|Hunter's Badge}} x50 | ||
|- | |- | ||
|Complete 5 Exploration Levels and reach 100% Exploration Progress | |Complete 5 Exploration Levels and reach 100% Exploration Progress | ||
|{{Item icon|Hunter's Badge}} x100 | |{{Item icon|Hunter's Badge}} x100 | ||
|- | |- | ||
|Complete 20 Exploration Levels and reach 100% Exploration Progress | |Complete 20 Exploration Levels and reach 100% Exploration Progress | ||
|{{Item icon|Hunter's Badge}} x150 | |{{Item icon|Hunter's Badge}} x150 | ||
|- | |- | ||
| Unlock all Beach areas | |Complete 30 Exploration Levels and reach 100% Exploration Progress | ||
|{{Item icon|Hunter's Badge}} x300 | |||
|- | |||
|Complete 40 Exploration Levels and reach 100% Exploration Progress | |||
|{{Currency|S-Chip}} x100 | |||
|- | |||
|Unlock all Beach areas | |||
|{{Currency|S-Chip}} x50 | |{{Currency|S-Chip}} x50 | ||
|- | |- | ||
| Line 223: | Line 289: | ||
|{{Currency|S-Chip}} x50 | |{{Currency|S-Chip}} x50 | ||
|- | |- | ||
| Unlock all Outer Island areas | |Unlock all Outer Island areas | ||
|{{Currency|S-Chip}} x50 | |{{Currency|S-Chip}} x50 | ||
|- | |- | ||
| Unlock 10 areas | |Unlock 10 areas | ||
|{{Item icon|Hunter's Badge}} x50 | |{{Item icon|Hunter's Badge}} x50 | ||
|- | |- | ||
| Line 233: | Line 299: | ||
|- | |- | ||
|Unlock 40 areas | |Unlock 40 areas | ||
|{{Item icon|Hunter's Badge}} x150 | | {{Item icon|Hunter's Badge}} x150 | ||
|- | |- | ||
| | | Unlock 60 areas | ||
|{{Item icon|Hunter's Badge}} x200 | |{{Item icon|Hunter's Badge}} x200 | ||
|- | |- | ||
| | | Unlock 80 areas | ||
|{{Item icon|Hunter's Badge}} x300 | |||
|{{Item icon|Hunter's Badge}} | |||
|- | |- | ||
| | | Unlock 98 areas | ||
| | |[[File:Treasure Hunter's Badge.png|30px|link=]] Treasure Hunter's Badge | ||
|- | |- | ||
|Complete Case Tracking 01-07 | |Complete Case Tracking 01-07 | ||
| Line 264: | Line 324: | ||
{{Item icon|Hunter's Badge}} x50 | {{Item icon|Hunter's Badge}} x50 | ||
|- | |- | ||
|Complete Luke Investigation 02-05 | | Complete Luke Investigation 02-05 | ||
|[[Luke "All Ready"]] | |[[Luke "All Ready"]] | ||
{{Item icon|Hunter's Badge}} x100 | {{Item icon|Hunter's Badge}} x100 | ||
|- | |||
| Complete Luke Investigation 03-03 | |||
|[[Luke "All Ready"]] | |||
{{Item icon|Hunter's Badge}} x150 | |||
|- | |||
| Complete Luke Investigation 03-04 | |||
|[[Luke "All Ready"]] | |||
{{Item icon|Hunter's Badge}} x200 | |||
|- | |- | ||
|Complete Artem Investigation 02-01 | |Complete Artem Investigation 02-01 | ||
|[[Artem "Here | |[[Artem "Here For You"]] | ||
{{Item icon|Hunter's Badge}} x50 | {{Item icon|Hunter's Badge}} x50 | ||
|- | |- | ||
|Complete Artem Investigation 02-03 | | Complete Artem Investigation 02-03 | ||
|[[Artem "Here | |[[Artem "Here For You"]] | ||
{{Item icon|Hunter's Badge}} x100 | {{Item icon|Hunter's Badge}} x100 | ||
|- | |||
|Complete Artem Investigation 03-03 | |||
|[[Artem "Here For You"]] | |||
{{Item icon|Hunter's Badge}} x150 | |||
|- | |||
|Complete Artem Investigation 03-05 | |||
|[[Artem "Here For You"]] | |||
{{Item icon|Hunter's Badge}} x200 | |||
|- | |- | ||
|Complete Vyn Investigation 02-01 | |Complete Vyn Investigation 02-01 | ||
|[[Vyn "Another Side of You"]] | | [[Vyn "Another Side of You"]] | ||
{{Item icon|Hunter's Badge}} x50 | {{Item icon|Hunter's Badge}} x50 | ||
|- | |- | ||
| Line 283: | Line 359: | ||
|[[Vyn "Another Side of You"]] | |[[Vyn "Another Side of You"]] | ||
{{Item icon|Hunter's Badge}} x100 | {{Item icon|Hunter's Badge}} x100 | ||
|- | |||
|Complete Vyn Investigation 03-03 | |||
|[[Vyn "Another Side of You"]] | |||
{{Item icon|Hunter's Badge}} x150 | |||
|- | |||
|Complete Vyn Investigation 03-04 | |||
|[[Vyn "Another Side of You"]] | |||
{{Item icon|Hunter's Badge}} x200 | |||
|- | |- | ||
|Complete Marius Investigation 02-01 | |Complete Marius Investigation 02-01 | ||
| Line 291: | Line 375: | ||
|[[Marius "Practice Makes Perfect"]] | |[[Marius "Practice Makes Perfect"]] | ||
{{Item icon|Hunter's Badge}} x100 | {{Item icon|Hunter's Badge}} x100 | ||
|- | |||
|Complete Marius Investigation 03-02 | |||
|[[Marius "Practice Makes Perfect"]] | |||
{{Item icon|Hunter's Badge}} x150 | |||
|- | |||
|Complete Marius Investigation 03-03 | |||
|[[Marius "Practice Makes Perfect"]] | |||
{{Item icon|Hunter's Badge}} x200 | |||
|- | |- | ||
|Complete Uncovering the Truth 04-01 | |Complete Uncovering the Truth 04-01 | ||
|{{Item icon|Hunter's Badge}} x300 | |{{Item icon|Hunter's Badge}} x300 | ||
|- | |||
|Complete Uncovering the Truth 04-06 | |||
|{{Currency|S-Chip}} x50 | |||
|- | |||
|Reach Workbench Lv. 1 in Facility Control | |||
|{{Item icon|Hunter's Badge}} x100 | |||
|- | |||
|Reach Workbench Lv. 2 in Facility Control | |||
|{{Item icon|Hunter's Badge}} x200 | |||
|- | |||
|Reach Workbench Lv. 3 in Facility Control | |||
|{{Currency|S-Chip}} x50 | |||
|- | |||
|Reach Supply Chest Lv. 1 in Facility Control | |||
|{{Item icon|Hunter's Badge}} x100 | |||
|- | |||
|Reach Supply Chest Lv. 2 in Facility Control | |||
|{{Item icon|Hunter's Badge}} x200 | |||
|- | |||
|Reach Supply Chest Lv. 3 in Facility Control | |||
|{{Currency|S-Chip}} x50 | |||
|- | |||
|Reach Camping Tent Lv. 1 in Facility Control | |||
|{{Item icon|Hunter's Badge}} x100 | |||
|- | |||
|Reach Camping Tent Lv. 2 in Facility Control | |||
|{{Item icon|Hunter's Badge}} x200 | |||
|- | |||
|Reach Camping Tent Lv. 3 in Facility Control | |||
|{{Currency|S-Chip}} x50 | |||
|} | |} | ||
===Daily Tasks === | ===Daily Tasks=== | ||
{| class="wikitable mw-collapsible mw-collapsed" | {| class="wikitable mw-collapsible mw-collapsed" | ||
!Quest|| Reward||Frequency | !Quest||Reward|| Frequency | ||
|- | |- | ||
|Participate in "Mysteries of the Lost Gold" | |Participate in "Mysteries of the Lost Gold" | ||
|{{Item icon|MA7 Locator}} x1 | |{{Item icon|MA7 Locator}} x1 | ||
|Daily | |Daily | ||
|- | |- | ||
|Complete 1 Mediation Today | |Complete 1 Mediation Today | ||
| Line 327: | Line 449: | ||
|} | |} | ||
==For Hearts and Mysteries - Event Shadow of Themis== | ==Notebook== | ||
During the event, the exclusive SSRs | Here, the player may re-watch any event story scenes previously viewed and review clues and useful items collected throughout the island. | ||
===Search Memo (Clue list)=== | |||
{{#cargo_query:tables=Item | |||
|fields=CONCAT('{{Item icon|', _pageName, '}}')=Name,obtain=Obtain,usageDescription=Required For | |||
|where=obtain HOLDS LIKE "Unlock \[\[Lost Gold%" | |||
|format=table | |||
}} | |||
==Rewards and Campaigns== | |||
===For Hearts and Mysteries - Event Shadow of Themis=== | |||
During the event, the exclusive SSRs {{Item icon|Luke "Iridescent Heartbeat"}}, {{Item icon|Artem "Dreamful Melodies"}}, {{Item icon|Vyn "Heartfelt Suspense"}}, and {{Item icon|Marius "In the Darkness"}} are on a rotating rateup schedule as follows: | |||
[[File:Heart and mysteries rate up cal.jpg|600px]] | [[File:Heart and mysteries rate up cal.jpg|600px]] | ||
==Hunter's Badge Exchange== | ===Hunter's Badge Exchange=== | ||
A total of {{Item icon|Hunter's Badge}} x8,870 is needed for the Graduate Shop, {{Item icon|Hunter's Badge}} x13,520 for the Junior Shop, and {{Item icon|Hunter's Badge}} x30,880 for the Senior Shop (excluding the expensive {{Currency|Stellin}} and Oracles), for a total of {{Item icon|Hunter's Badge}} x53,270. An additional {{Item icon|Hunter's Badge}} x69,930 is required to purchase the remaining Stellin and Oracles. | A total of {{Item icon|Hunter's Badge}} x8,870 is needed for the Graduate Shop, {{Item icon|Hunter's Badge}} x13,520 for the Junior Shop, and {{Item icon|Hunter's Badge}} x30,880 for the Senior Shop (excluding the expensive {{Currency|Stellin}} and Oracles), for a total of {{Item icon|Hunter's Badge}} x53,270. An additional {{Item icon|Hunter's Badge}} x69,930 is required to purchase the remaining Stellin and Oracles. | ||
{{tab/start}} | |||
{| class="wikitable | {{tab/header|Graduate Shop}} | ||
{| class="wikitable" | |||
!Item||Cost||Limit | !Item||Cost||Limit | ||
|- | |- | ||
|{{Currency|Stellin}} x10,000||80||40 | |{{Currency|Stellin}} x10,000||80||40 | ||
|- | |- | ||
| {{Item icon|Logic Chip III}}||25||10 | |{{Item icon|Logic Chip III}}||25||10 | ||
|- | |- | ||
| {{Item icon|Empathy Chip III}}||25||10 | |{{Item icon|Empathy Chip III}}||25||10 | ||
|- | |- | ||
| {{Item icon|Intuition Chip III}}||25||10 | |{{Item icon|Intuition Chip III}}||25||10 | ||
|- | |- | ||
| {{Item icon|Vision Chip III}}||25||10 | |{{Item icon|Vision Chip III}}||25||10 | ||
|- | |- | ||
| {{Item icon|Equalization Chip III}}||25||10 | |{{Item icon|Equalization Chip III}}|| 25||10 | ||
|- | |- | ||
| {{Item icon|Mind Chip III}}||25||10 | |{{Item icon|Mind Chip III}}||25 ||10 | ||
|- | |- | ||
| {{Item icon|Infinity Chip III}}||25||10 | |{{Item icon|Infinity Chip III}} ||25||10 | ||
|- | |- | ||
| {{Item icon|Logic Impression II}} x5||40|| 6 | |{{Item icon|Logic Impression II}} x5||40 ||6 | ||
|- | |- | ||
| {{Item icon|Empathy Impression II}} x5||40|| 6 | |{{Item icon|Empathy Impression II}} x5||40||6 | ||
|- | |- | ||
| {{Item icon|Intuition Impression II}} x5||40|| 6 | |{{Item icon|Intuition Impression II}} x5||40|| 6 | ||
|- | |- | ||
| {{Item icon|Wide-Angle Lens}} x5||40||10 | |{{Item icon|Wide-Angle Lens}} x5||40||10 | ||
|- | |- | ||
| {{Item icon|Bag of Dried Figs}} x5||40||10 | |{{Item icon|Bag of Dried Figs}} x5||40||10 | ||
|- | |- | ||
| {{Item icon|Fountain Pen}} x5||40||10 | |{{Item icon|Fountain Pen}} x5||40||10 | ||
|- | |- | ||
| {{Item icon|Tablet}} x5||40||10 | |{{Item icon|Tablet}} x5||40||10 | ||
|- | |- | ||
| {{Item icon|Vinyl Record}} x5||40||10 | |{{Item icon|Vinyl Record}} x5|| 40||10 | ||
|- | |- | ||
| {{Item icon|Wooden Gardening Spade}} x5||40||10 | |{{Item icon|Wooden Gardening Spade}} x5||40||10 | ||
|- | |- | ||
| {{Item icon|Oil-Painting Tools}} x5||40||10 | |{{Item icon|Oil-Painting Tools}} x5||40||10 | ||
|- | |- | ||
| {{Item icon|Block Component}} x5||40|| | |{{Item icon|Block Component}} x5||40|| | ||
10 | 10 | ||
|} | |} | ||
{{tab/header|Junior Shop}} | |||
{| class="wikitable" | |||
{| class="wikitable | ! Item||Cost||Limit | ||
!Item||Cost||Limit | |||
|- | |- | ||
|{{Currency|Stellin}} x10,000||80||40 | |{{Currency|Stellin}} x10,000||80||40 | ||
|- | |- | ||
| {{Item icon|Oracle of Justice IV}} x5 || 100||60 | |{{Item icon|Oracle of Justice IV}} x5||100||60 | ||
|- | |- | ||
| {{Item icon|Logic Impression III}} x5||80|| 2 | |{{Item icon|Logic Impression III}} x5 ||80||2 | ||
|- | |- | ||
| {{Item icon|Empathy Impression II}} x5||80|| 2 | |{{Item icon|Empathy Impression II}} x5|| 80||2 | ||
|- | |- | ||
| {{Item icon|Intuition Impression II}} x5||80|| 2 | |{{Item icon|Intuition Impression II}} x5||80 ||2 | ||
|- | |- | ||
| {{Item icon|Multipurpose Military Knife}} x5||80|| 6 | |{{Item icon|Multipurpose Military Knife}} x5||80 ||6 | ||
|- | |- | ||
| {{Item icon|Pill Organizer}} x5||80|| 6 | |{{Item icon|Pill Organizer}} x5 ||80||6 | ||
|- | |- | ||
| {{Item icon|Tie Clip}} x5||80|| 6 | |{{Item icon|Tie Clip}} x5||80||6 | ||
|- | |- | ||
| {{Item icon|Sapphire Cufflinks}} x5||80|| 6 | |{{Item icon|Sapphire Cufflinks}} x5 ||80||6 | ||
|- | |- | ||
| {{Item icon|Voice Recorder}} x5||80|| 6 | | {{Item icon|Voice Recorder}} x5||80||6 | ||
|- | |- | ||
| {{Item icon|Pocket Watch}} x5||80|| 6 | |{{Item icon|Pocket Watch}} x5||80||6 | ||
|- | |- | ||
| {{Item icon|Touch Stylus}} x5||80|| 6 | |{{Item icon|Touch Stylus}} x5|| 80||6 | ||
|- | |- | ||
| {{Item icon|Bluetooth Earpiece}} x5||80||6 | |{{Item icon|Bluetooth Earpiece}} x5||80||6 | ||
|} | |} | ||
{{tab/header|Senior Shop}} | |||
{| class="wikitable" | |||
{| class="wikitable | !Item ||Cost||Limit | ||
!Item||Cost||Limit | |||
|- | |- | ||
|[[File:Sea Breeze Invitation | |[[File:Sea Breeze Invitation preview.png|30px]] Sea Breeze||10000||1 | ||
|- | |- | ||
|{{Currency|Tears of Themis - Pursuit}}||1000||10 | |{{Currency|Tears of Themis - Pursuit}}||1000||10 | ||
|- | |- | ||
| {{Item icon|Vision Star | | {{Item icon|Vision Star SR}}||1000||2 | ||
|- | |- | ||
| {{Item icon|Equalization Star | |{{Item icon|Equalization Star SR}}|| 1000||2 | ||
|- | |- | ||
| {{Item icon|Mind Star | |{{Item icon|Mind Star SR}}||1000||2 | ||
|- | |- | ||
| {{Item icon|Infinity Star | |{{Item icon|Infinity Star SR}}||1000|| 2 | ||
|- | |- | ||
| {{Item icon|Poetry Collection}} x5 || 120|| 3 | |{{Item icon|Poetry Collection}} x5 ||120||3 | ||
|- | |- | ||
| {{Item icon|Senior Attorney's Badge}} x5 || 120|| 3 | | {{Item icon|Senior Attorney's Badge}} x5||120||3 | ||
|- | |- | ||
| {{Item icon|Model Handgun}} x5 || 120|| 3 | |{{Item icon|Model Handgun}} x5||120||3 | ||
|- | |- | ||
| {{Item icon|Gilded Poker Cards}} x5 || 120|| 3 | |{{Item icon|Gilded Poker Cards}} x5 || 120||3 | ||
|- | |- | ||
| {{Item icon|Ceramic Tea Cup}} x5 || 120|| 3 | |{{Item icon|Ceramic Tea Cup}} x5||120||3 | ||
|- | |- | ||
| {{Item icon|Stud Earring}} x5 || 120|| 3 | |{{Item icon|Stud Earring}} x5||120||3 | ||
|- | |- | ||
| {{Item icon|Pass Key}} x5 || 120|| 3 | |{{Item icon|Pass Key}} x5||120||3 | ||
|- | |- | ||
|{{Currency|Stellin}} x1000||40 | |{{Currency|Stellin}} x1000||40 | ||
| | | | ||
999 | 999 | ||
|- | |- | ||
| {{Item icon|Oracle of Justice III}}||30 | |{{Item icon|Oracle of Justice III}}||30 | ||
| | | | ||
999 | 999 | ||
|} | |} | ||
{{tab/end}} | |||
== | ===Island Exploration Login Campaign=== | ||
Here | [[File:Lost Gold Login Campaign promo.png|thumb]] | ||
Players who log in during the event receive the rewards below based on the number of cumulative logins: | |||
{| class="wikitable" | |||
!Day || Reward | |||
|- | |||
| Day 1 || {{Currency|Tears of Themis - Limited}} x10 | |||
|- | |||
| Day 2 || [[File:Luke "All Ready" icon.png|28px|link=]] [[Luke "All Ready"]] | |||
|- | |||
| Day 3 || [[File:Artem "Here For You" icon.png|28px|link=]] [[Artem "Here For You"]] | |||
|- | |||
| Day 4 || [[File:Vyn "Another Side of You" icon.png|28px|link=]] [[Vyn "Another Side of You"]] | |||
|- | |||
| Day 5 || [[File:Marius "Practice Makes Perfect" icon.png|28px|link=]] [[Marius "Practice Makes Perfect"]] | |||
|- | |||
| Day 6 || {{Item icon|Energy Drink Family Pack}} x2 | |||
|- | |||
| Day 7 || {{Currency|Tears of Themis - Limited}} x1 | |||
|- | |||
| Day 8 || {{Item icon|Energy Drink Family Pack}} x2 | |||
|- | |||
| Day 9 || {{Currency|Tears of Themis - Limited}} x1 | |||
|- | |||
| Day 10 || {{Item icon|Energy Drink Family Pack}} x2 | |||
|- | |||
| Day 11 || {{Currency|Tears of Themis - Limited}} x2 | |||
|} | |||
==Mall Event Items== | ===Mall Event Items=== | ||
===Time-Limited Packs === | ====Time-Limited Packs==== | ||
{| class="wikitable" | {| class="wikitable" | ||
!Pack Name||Contents||Price (USD)||Limit | !Pack Name ||Contents||Price (USD) ||Limit | ||
|- | |- | ||
![[File:Card Material Pack.png|300px|link=]]<br />Card Material Pack | ![[File:Card Material Pack.png|300px|link=]]<br />Card Material Pack | ||
| {{Item icon|Vision Chip II}} x5 | |{{Item icon|Vision Chip II}} x5 | ||
{{Item icon|Vision Chip III}} x5 | {{Item icon|Vision Chip III}} x5 | ||
| Line 476: | Line 637: | ||
{{Currency|Stellin}} x50000 | {{Currency|Stellin}} x50000 | ||
|{{Currency|Gem}} x9 | |{{Currency|Gem}} x9 | ||
|4/account | |4/account | ||
|- | |- | ||
![[File:Equalization Material Pack.png|300px|link=]]<br />Equalization Material Pack | ![[File:Equalization Material Pack.png|300px|link=]]<br />Equalization Material Pack | ||
| {{Item icon|Equalization Chip II}} x5 | |{{Item icon|Equalization Chip II}} x5 | ||
{{Item icon|Equalization Chip III}} x5 | {{Item icon|Equalization Chip III}} x5 | ||
| Line 500: | Line 661: | ||
|- | |- | ||
![[File:Mind Material Pack.png|300px|link=]]<br />Mind Material Pack | ![[File:Mind Material Pack.png|300px|link=]]<br />Mind Material Pack | ||
| {{Item icon|Mind Chip II}} x5 | |{{Item icon|Mind Chip II}} x5 | ||
{{Item icon|Mind Chip III}} x5 | {{Item icon|Mind Chip III}} x5 | ||
| Line 539: | Line 700: | ||
{{Currency|Stellin}} x50000 | {{Currency|Stellin}} x50000 | ||
|{{Currency|Gem}} x9 | |{{Currency|Gem}} x9 | ||
|4/account | |4/account | ||
|} | |} | ||
===Event Packs === | ====Event Packs==== | ||
{| class="wikitable" | {| class="wikitable" | ||
!Pack Name||Contents||Price (USD)||Limit | !Pack Name||Contents||Price (USD)||Limit | ||
| Line 549: | Line 710: | ||
|{{Currency|Tears of Themis - Pursuit}} x10 | |{{Currency|Tears of Themis - Pursuit}} x10 | ||
|{{Currency|S-Chip}} x1440 | |{{Currency|S-Chip}} x1440 | ||
|6/account | |6/account | ||
|- | |- | ||
![[File:Expedition Vision Pack I.png|300px|link=]]<br />Expedition Vision Pack I | ![[File:Expedition Vision Pack I.png|300px|link=]]<br />Expedition Vision Pack I | ||
| Line 561: | Line 722: | ||
|1/day | |1/day | ||
|- | |- | ||
![[File:Expedition Vision Pack II.png|300px|link=]]<br />Expedition Vision Pack II | ![[File:Expedition Vision Pack II.png|300px|link=]]<br />Expedition Vision Pack II | ||
| | | | ||
{{Currency|Tears of Themis - Pursuit}} x5 | {{Currency|Tears of Themis - Pursuit}} x5 | ||
| Line 571: | Line 732: | ||
|2/account | |2/account | ||
|- | |- | ||
![[File:Expedition Vision Pack III.png|300px|link=]]<br />Expedition Vision Pack III | ! [[File:Expedition Vision Pack III.png|300px|link=]]<br />Expedition Vision Pack III | ||
| | | | ||
{{Currency|Tears of Themis - Pursuit}} x10 | {{Currency|Tears of Themis - Pursuit}} x10 | ||
{{Item icon| | {{Item icon|Selection Chip II}} x8 | ||
{{Item icon| | {{Item icon|Selection Chip III}} x5 | ||
{{Item icon|Oracle of Justice IV}} x10 | {{Item icon|Oracle of Justice IV}} x10 | ||
| | | | ||
$11.99 | $11.99 | ||
|2/account | |2/account | ||
|- | |- | ||
![[File:Treasure Energy Pack.png|300px|link=]]<br />Treasure Energy Pack | ![[File:Treasure Energy Pack.png|300px|link=]]<br />Treasure Energy Pack | ||
| {{Item icon|Energy Drink Family Pack}} x4 | |{{Item icon|Energy Drink Family Pack}} x4 | ||
|$0.99 | |$0.99 | ||
| | | | ||
3/week | 3/week | ||
|- | |- | ||
![[File:Treasure Vision Pack.png|300px|link=]]<br />Treasure Vision Pack | ! [[File:Treasure Vision Pack.png|300px|link=]]<br />Treasure Vision Pack | ||
|{{Currency|Tears of Themis - Pursuit}} x1 | |{{Currency|Tears of Themis - Pursuit}} x1 | ||
|{{Currency|Gem}} x6 | |{{Currency|Gem}} x6 | ||
| | | | ||
1/week | 1/week | ||
|- | |- | ||
![[File:Treasure Vision Pack II.png|300px|link=]]<br />Treasure Vision Pack II | ![[File:Treasure Vision Pack II.png|300px|link=]]<br />Treasure Vision Pack II | ||
| Line 602: | Line 763: | ||
1/week | 1/week | ||
|} | |} | ||
==Gallery== | |||
<gallery> | |||
File:Map of Nosta.png|Nosta | |||
File:Lost Gold Nosta Beach.jpg|Nosta: Beach | |||
File:Nosta Beach Cave.jpg|Nosta: Beach Cave | |||
File:Nosta Mountain Flower Field.jpg|Nosta: Mountain Flower Field | |||
File:Nosta Cave.jpg|Nosta: Cave | |||
File:2021-09-24 DAVIS' Nosta Observation Diary 1.jpg|Lost Gold trivia 1 | |||
File:2021-09-24 DAVIS' Nosta Observation Diary 2.jpg|Lost Gold trivia 2 | |||
File:2021-09-24 DAVIS' Nosta Observation Diary 3.jpg|Lost Gold trivia 3 | |||
File:2021-09-24 DAVIS' Nosta Observation Diary 4.jpg|Lost Gold trivia 4 | |||
</gallery> | |||
{{Event navbox}} | |||
{{#seo: | |||
|title={{PAGENAME}} - Tears of Themis Wiki | |||
|keywords=tears of themis lost gold,tears of themis lost gold event,lost gold event,tears of themis lost gold maps,tears of themis lost gold event maps,tears of themis lost gold tile unlocks,tears of themis lost gold event tile unlocks,tears of themis lost gold med-04,tears of themis lost gold event med-04,tears of themis lost gold supplies guide,tears of themis lost gold event supplies guide | |||
|description=Information detailing the Mysteries of the Lost Gold Event in Tears of Themis. | |||
}} | |||
[[Category:Events]] | |||
Latest revision as of 05:55, 16 April 2024
| DLC Re-release Available!
You are viewing the page for a limited-time event that has since ended and been re-released as permanent DLC. Some of the information below may not apply to the version currently available for play. For the permanent version of this content, see Mysteries of the Lost Gold (DLC) |

| Mysteries of the Lost Gold | |
|---|---|
| Start Date | 2021-09-03 11:00 UTC +9 |
| End Date | 2021-09-27 10:59 UTC +9 |
| Duration | Approx. 24 days |
The veil lifts from the mystery of an ancient legend...
Unknown dangers lie on the journey ahead—
Mysteries of the Lost Gold is a time-limited event that occurred between Sept. 03, 2021 to Sept. 27, 2021.
Adventure[edit | edit source]
Players during the event explore a hexagonal map to unlock resources and rewards as they follow the characters in Nosta.
Story/Exploration Stages[edit | edit source]
Nosta's map is a hexagonal grid consisting of several stage types: primarily these are Story Stages and Exploration Stages. Each tile costs some amount of supplies to unlock (listed below); tiles which cross "Border Checkpoints" unlock in pairs, and the cost needs only be paid once for the pair (for example, unlocking Lost Gold Story 01-07 also unlocks Explore Nosta Forest VII for "free").
- Story Stages take the player through the event-exclusive storyline; the story is joined in Act I, then splits apart into four paths for Act II and Act III before rejoining for Act IV. In order to view a story tile, the player must have viewed all story stages that precede that chapter; this means that to view the Act IV story, the player must have finished all four routes for Act II and III.
- Exploration Stages put the player onto a grid-based map where the player must complete map tasks such as defeating a Boss, finding Supply chests, and finding the Exit. In the Beach, Forest, and Mountain exploration stages, one Supply Chest per stage will contain
 Universal Part x1, used for upgrading Facilities; all remaining Supply Chests will contain varying amounts of
  S-Chips (often 10, but up to 100).
 Beach[edit | edit source]

Unlocking all tiles on the beach requires ![]() Emergency Medicine x475,
Emergency Medicine x475, ![]() Lumber x555,
Lumber x555, ![]() MRE x475,
MRE x475, ![]() Drinking Water x475. The player begins the event with 500 of each resource, and the remaining lumber is part of the work order tutorial, so it's possible to unlock all Beach stages immediately.
Drinking Water x475. The player begins the event with 500 of each resource, and the remaining lumber is part of the work order tutorial, so it's possible to unlock all Beach stages immediately.
Story Stages[edit | edit source]
| Stage Name | Unlock Cost |
|---|---|
| Lost Gold Story 01-01 | |
| Lost Gold Story 01-02 | |
| Lost Gold Story 01-03 | |
| Lost Gold Story 01-04 | |
| Lost Gold Story 01-04 | |
| Lost Gold Story 01-05 | |
| Lost Gold Story 01-06 | |
| Lost Gold Story 01-07 |
Exploration Stages[edit | edit source]
| Stage Name | Unlock Cost |
|---|---|
| Lost Gold Explore Nosta Beach II | |
| Lost Gold Explore Nosta Beach I |
 Forest[edit | edit source]

Unlocking all tiles in the forest requires ![]() Emergency Medicine x6,340,
Emergency Medicine x6,340, ![]() Lumber x6,345,
Lumber x6,345, ![]() MRE x6,015,
MRE x6,015, ![]() Drinking Water x6,350.
Drinking Water x6,350.
Story Stages[edit | edit source]
Exploration Stages[edit | edit source]
 Mountain[edit | edit source]

Unlocking all tiles in the mountain region requires ![]() Emergency Medicine x7,420,
Emergency Medicine x7,420, ![]() Lumber x7,320,
Lumber x7,320, ![]() MRE x7,840,
MRE x7,840, ![]() Drinking Water x7,220.
Drinking Water x7,220.
Story Stages[edit | edit source]
Exploration Stages[edit | edit source]
 Outer Island[edit | edit source]

Unlocking all tiles on the outer island requires ![]() Emergency Medicine x6,000,
Emergency Medicine x6,000, ![]() Lumber x6,000,
Lumber x6,000, ![]() MRE x6,000,
MRE x6,000, ![]() Drinking Water x6,000.
Drinking Water x6,000.
Story Stages[edit | edit source]
| Stage Name | Unlock Cost |
|---|---|
| Lost Gold Story 04-02 | |
| Lost Gold Story 04-03 | |
| Lost Gold Story 04-04 | |
| Lost Gold Story 04-05 | |
| Lost Gold Story 04-06 |
Exploration Stages[edit | edit source]
Mediation Stages[edit | edit source]
Mediation Stages reward ![]() S-Chips on first clear as well as
S-Chips on first clear as well as ![]() Hunter's Badge that players can use to redeem rewards at the Hunter's Badge Exchange.
Hunter's Badge that players can use to redeem rewards at the Hunter's Badge Exchange.
There is one Mediation stage per region.
| Stage Name | Unlock Cost | Drops | Recommended power |
|---|---|---|---|
| MED-01 | 6775 | ||
| MED-02 | 20506 | ||
| MED-03 | 58853 | ||
| MED-04 | 94243 |
Urgent Survey Stages[edit | edit source]
Urgent Survey Stages consume ![]() MA7 Locator x1 to scan the map to find contestants to debate against. Defeating them rewards a large amount of
MA7 Locator x1 to scan the map to find contestants to debate against. Defeating them rewards a large amount of ![]() Hunter's Badge (200 on first clear, 100 after).
Hunter's Badge (200 on first clear, 100 after).
Supply[edit | edit source]

Facility Control[edit | edit source]
Upon completing the first Exploration stage, the player will gain access to Facility Control, where ![]() Universal Part may be exchanged for buffs to influence, defense, and resource gathering throughout the event.
Universal Part may be exchanged for buffs to influence, defense, and resource gathering throughout the event.
Workbench[edit | edit source]
The Workbench boosts Defense of all cards by a given % during event debates.
| Level | Buff amount | Cost to next level |
|---|---|---|
| 0 | 10% | |
| 1 | 10% | |
| 2 | 20% | |
| 3 | 30% | (MAX) |
Supply[edit | edit source]
Supply boosts resources gathered by all characters by a given % during event tasks. Requires Workbench Lv. 3.
| Level | Buff amount | Cost to next level |
|---|---|---|
| 0 | 0% | |
| 1 | 10% | |
| 2 | 20% | |
| 3 | 30% | |
| 4 | 40% | |
| 5 | 50% | (MAX) |
Tent[edit | edit source]
Tent boosts Influence of all cards by a given % during event debates. Requires Workbench Lv. 3
| Level | Buff amount | Cost to next level |
|---|---|---|
| 0 | 0% | |
| 1 | 10% | |
| 2 | 20% | |
| 3 |
30% |
(MAX) |
Work Orders[edit | edit source]
Work Orders are unlocked after completing Lost Gold 01-06 and generate supplies over time for unlocking additional land area tiles in Mysteries of the Lost Gold. A player can assign each of the four male leads to an item. Unlocking all map tiles requires approximately 20,000 of each resource type. Each of the male leads has his own specialty when it comes to gathering supplies. The available supplies, their default guys, and their timings are as follows:
| Item | Luke | Artem | Vyn | Marius | Time (hours) | Default Character |
|---|---|---|---|---|---|---|
| 60 | 40 | 30 | 50 | 1 | Luke | |
| 50 | 30 | 60 | 40 | 1 |
Vyn | |
| 40 | 60 | 50 | 30 | 1 | Artem | |
| 30 | 50 | 40 | 60 | 1 |
Marius | |
| 1 | 1 | 1 | 1 | 24 |
N/A |
*MA7 Locator is unlocked after completing all land areas.
When all 98 areas of Nosta are unlocked, ![]() Lumber,
Lumber, ![]() Emergency Medicine,
Emergency Medicine, ![]() MRE, and
MRE, and ![]() Drinking Water Work Orders supply selection automatically change to
Drinking Water Work Orders supply selection automatically change to ![]() MA7 Locator. A total of three can be held, each requiring 24 hr to find. The previous resources can no longer be selected. After Sept. 14, the Speed Up option for Work Orders will be available.
MA7 Locator. A total of three can be held, each requiring 24 hr to find. The previous resources can no longer be selected. After Sept. 14, the Speed Up option for Work Orders will be available.
Investigation Plan[edit | edit source]
Badges and other items may be obtained from event tasks as follows:
Task List[edit | edit source]
| Quest | Reward |
|---|---|
| Complete 1 Exploration Levels and reach 100% Exploration Progress | |
| Complete 5 Exploration Levels and reach 100% Exploration Progress | |
| Complete 20 Exploration Levels and reach 100% Exploration Progress | |
| Complete 30 Exploration Levels and reach 100% Exploration Progress | |
| Complete 40 Exploration Levels and reach 100% Exploration Progress | |
| Unlock all Beach areas | |
| Unlock all Forest areas | |
| Unlock all Mountain areas | |
| Unlock all Outer Island areas | |
| Unlock 10 areas | |
| Unlock 20 areas | |
| Unlock 40 areas | |
| Unlock 60 areas | |
| Unlock 80 areas | |
| Unlock 98 areas | |
| Complete Case Tracking 01-07 |
|
| Complete Luke Investigation 02-01 | Luke "All Ready"
|
| Complete Luke Investigation 02-05 | Luke "All Ready"
|
| Complete Luke Investigation 03-03 | Luke "All Ready"
|
| Complete Luke Investigation 03-04 | Luke "All Ready"
|
| Complete Artem Investigation 02-01 | Artem "Here For You"
|
| Complete Artem Investigation 02-03 | Artem "Here For You"
|
| Complete Artem Investigation 03-03 | Artem "Here For You"
|
| Complete Artem Investigation 03-05 | Artem "Here For You"
|
| Complete Vyn Investigation 02-01 | Vyn "Another Side of You"
|
| Complete Vyn Investigation 02-04 | Vyn "Another Side of You"
|
| Complete Vyn Investigation 03-03 | Vyn "Another Side of You"
|
| Complete Vyn Investigation 03-04 | Vyn "Another Side of You"
|
| Complete Marius Investigation 02-01 | Marius "Practice Makes Perfect"
|
| Complete Marius Investigation 02-04 | Marius "Practice Makes Perfect"
|
| Complete Marius Investigation 03-02 | Marius "Practice Makes Perfect"
|
| Complete Marius Investigation 03-03 | Marius "Practice Makes Perfect"
|
| Complete Uncovering the Truth 04-01 | |
| Complete Uncovering the Truth 04-06 | |
| Reach Workbench Lv. 1 in Facility Control | |
| Reach Workbench Lv. 2 in Facility Control | |
| Reach Workbench Lv. 3 in Facility Control | |
| Reach Supply Chest Lv. 1 in Facility Control | |
| Reach Supply Chest Lv. 2 in Facility Control | |
| Reach Supply Chest Lv. 3 in Facility Control | |
| Reach Camping Tent Lv. 1 in Facility Control | |
| Reach Camping Tent Lv. 2 in Facility Control | |
| Reach Camping Tent Lv. 3 in Facility Control |
Daily Tasks[edit | edit source]
| Quest | Reward | Frequency |
|---|---|---|
| Participate in "Mysteries of the Lost Gold" | Daily | |
| Complete 1 Mediation Today |
Daily | |
| Complete 3 Mediation Today |
Daily | |
| Complete 5 Mediation Today |
Daily | |
| Complete 1 Urgent Survey | Daily |
Notebook[edit | edit source]
Here, the player may re-watch any event story scenes previously viewed and review clues and useful items collected throughout the island.
Search Memo (Clue list)[edit | edit source]
Rewards and Campaigns[edit | edit source]
For Hearts and Mysteries - Event Shadow of Themis[edit | edit source]
During the event, the exclusive SSRs ![]() Luke "Iridescent Heartbeat",
Luke "Iridescent Heartbeat", ![]() Artem "Dreamful Melodies",
Artem "Dreamful Melodies", ![]() Vyn "Heartfelt Suspense", and
Vyn "Heartfelt Suspense", and ![]() Marius "In the Darkness" are on a rotating rateup schedule as follows:
Marius "In the Darkness" are on a rotating rateup schedule as follows:

Hunter's Badge Exchange[edit | edit source]
A total of ![]() Hunter's Badge x8,870 is needed for the Graduate Shop,
Hunter's Badge x8,870 is needed for the Graduate Shop, ![]() Hunter's Badge x13,520 for the Junior Shop, and
Hunter's Badge x13,520 for the Junior Shop, and ![]() Hunter's Badge x30,880 for the Senior Shop (excluding the expensive
Hunter's Badge x30,880 for the Senior Shop (excluding the expensive ![]() Stellin and Oracles), for a total of
Stellin and Oracles), for a total of ![]() Hunter's Badge x53,270. An additional
Hunter's Badge x53,270. An additional ![]() Hunter's Badge x69,930 is required to purchase the remaining Stellin and Oracles.
Hunter's Badge x69,930 is required to purchase the remaining Stellin and Oracles.
| Item | Cost | Limit |
|---|---|---|
| 80 | 40 | |
| 25 | 10 | |
| 25 | 10 | |
| 25 | 10 | |
| 25 | 10 | |
| 25 | 10 | |
| 25 | 10 | |
| 25 | 10 | |
| 40 | 6 | |
| 40 | 6 | |
| 40 | 6 | |
| 40 | 10 | |
| 40 | 10 | |
| 40 | 10 | |
| 40 | 10 | |
| 40 | 10 | |
| 40 | 10 | |
| 40 | 10 | |
| 40 |
10 |
| Item | Cost | Limit |
|---|---|---|
| 80 | 40 | |
| 100 | 60 | |
| 80 | 2 | |
| 80 | 2 | |
| 80 | 2 | |
| 80 | 6 | |
| 80 | 6 | |
| 80 | 6 | |
| 80 | 6 | |
| 80 | 6 | |
| 80 | 6 | |
| 80 | 6 | |
| 80 | 6 |
| Item | Cost | Limit |
|---|---|---|
| 10000 | 1 | |
| 1000 | 10 | |
| 1000 | 2 | |
| 1000 | 2 | |
| 1000 | 2 | |
| 1000 | 2 | |
| 120 | 3 | |
| 120 | 3 | |
| 120 | 3 | |
| 120 | 3 | |
| 120 | 3 | |
| 120 | 3 | |
| 120 | 3 | |
| 40 |
999 | |
| 30 |
999 |
Island Exploration Login Campaign[edit | edit source]

Players who log in during the event receive the rewards below based on the number of cumulative logins:
| Day | Reward |
|---|---|
| Day 1 | |
| Day 2 | |
| Day 3 | |
| Day 4 | |
| Day 5 | |
| Day 6 | |
| Day 7 | |
| Day 8 | |
| Day 9 | |
| Day 10 | |
| Day 11 |
Mall Event Items[edit | edit source]
Time-Limited Packs[edit | edit source]
| Pack Name | Contents | Price (USD) | Limit |
|---|---|---|---|
 Card Material Pack |
|
4/account | |
 Equalization Material Pack |
|
4/account | |
 Mind Material Pack |
|
4/account | |
 Infinity Material Pack |
|
4/account |
Event Packs[edit | edit source]
| Pack Name | Contents | Price (USD) | Limit |
|---|---|---|---|
 Special Treasure Pack |
6/account | ||
 Expedition Vision Pack I |
|
$0.99 | 1/day |
 Expedition Vision Pack II |
|
$5.99 | 2/account |
 Expedition Vision Pack III |
|
$11.99 |
2/account |
 Treasure Energy Pack |
$0.99 |
3/week | |
 Treasure Vision Pack |
1/week | ||
 Treasure Vision Pack II |
1/week |
Gallery[edit | edit source]
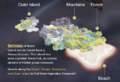
Nosta
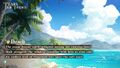
Nosta: Beach
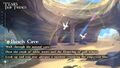
Nosta: Beach Cave
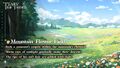
Nosta: Mountain Flower Field
Nosta: Cave
Lost Gold trivia 1
Lost Gold trivia 2
Lost Gold trivia 3
Lost Gold trivia 4


